Security
SlashDB is based on two levels of authentication and authorization.
- Access to the API (and GUI)
- Access to data
Accordingly
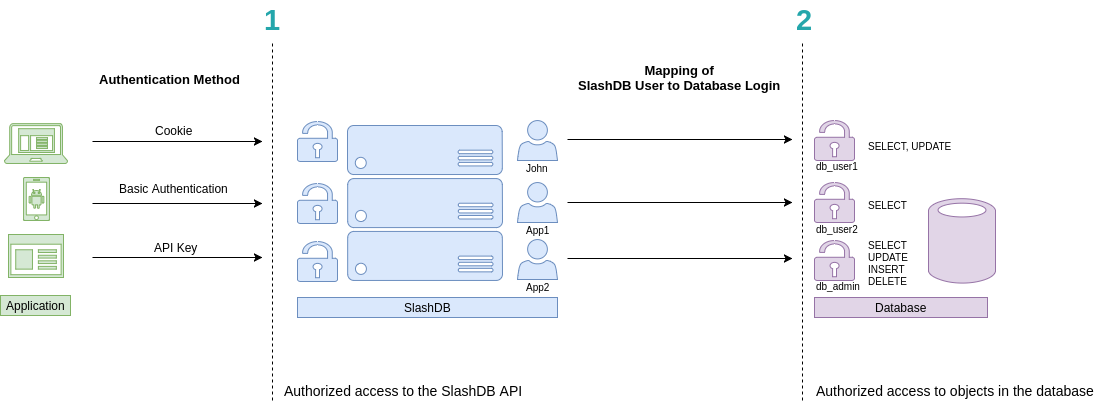
- Each request to the API has to be made on behalf of a certain SlashDB user. In above picture they are John, App1 and App2. These users can be authenticated by passing valid credentials using one of available methods: provide a cookie, basic authentication or API key.
- Each SlashDB user (pictured in blue) can be mapped to a database login (more on that in User Configuration section). As a result, every request from that user will execute queries in the database under privileges the assigned database user (db_user1, db_user2 or db_admin as pictured above in purple). Database permissions are effectively passed on to SlashDB user.
In above example we have 3 common scenarios:
- John is visiting SlashDB API via a browser. He logs in using his SlashDB username and password. He is identified as John and his browser receives a cookie. The cookie is sent with each subsequent request. John's account in SlashDB has been configured to use db_user1 database login when making queries. Effectively John can SELECT or UPDATE data, as those are the privileges that were configured in the database.
- A mobile application sends SlashDB credentials using Basic Authentication method. The credentials identifies the mobile application as SlashDB user App1, which uses database login db_user2 when connecting to the database. Effectively App1 can only SELECT data.
- Another application utilizes an API key to authenticate, which is sent with every request. The application is recognized as SlashDB user App2, which uses database login db_admin. Effectively this application can SELECT, UPDATE, INSERT and DELETE data.
Authentication
Out of the box SlashDB provides most common authentication mechanisms:
- API Key
- Single Sign On
- Basic Authentication
- Login and password
- Cookie Session
- Public (unauthenticated) access
Other methods can be added right to SlashDB using custom WSGI middlewares or by making SlashDB an endpoint behind a third party authentication system.
SSO / OpenID Connect
 This feature is available only in Enterprise Edition
Authentication can be delegated to Identity Providers like MS Azure AD, Okta, PingOne, Google and other that implement OpenID Connect.
In order to authenticate and authorize request SlashDB:
- takes the ID Token sent as JWT in header
Authorization, - takes identity provider id from header
X-Identity-Provider-Id, - verifies the token and its signature with proper identity provider,
- finds SlashDB user by comparing value of the claim of the id token with
attribute in user config e.g.
id token email == user config email, - checks permission to the requested resource.
When process is successful a response with resource is returned. In case of
HTML format a Set-Cookie header is sent to create a browser session.
Setup
Install SlashDB License that allows SSO.

Enable SSO by editing /etc/slashdb/auth.cfg and configuring identity providers.
By default the auth.cfg file is delivered with disabled JWT authentication policy
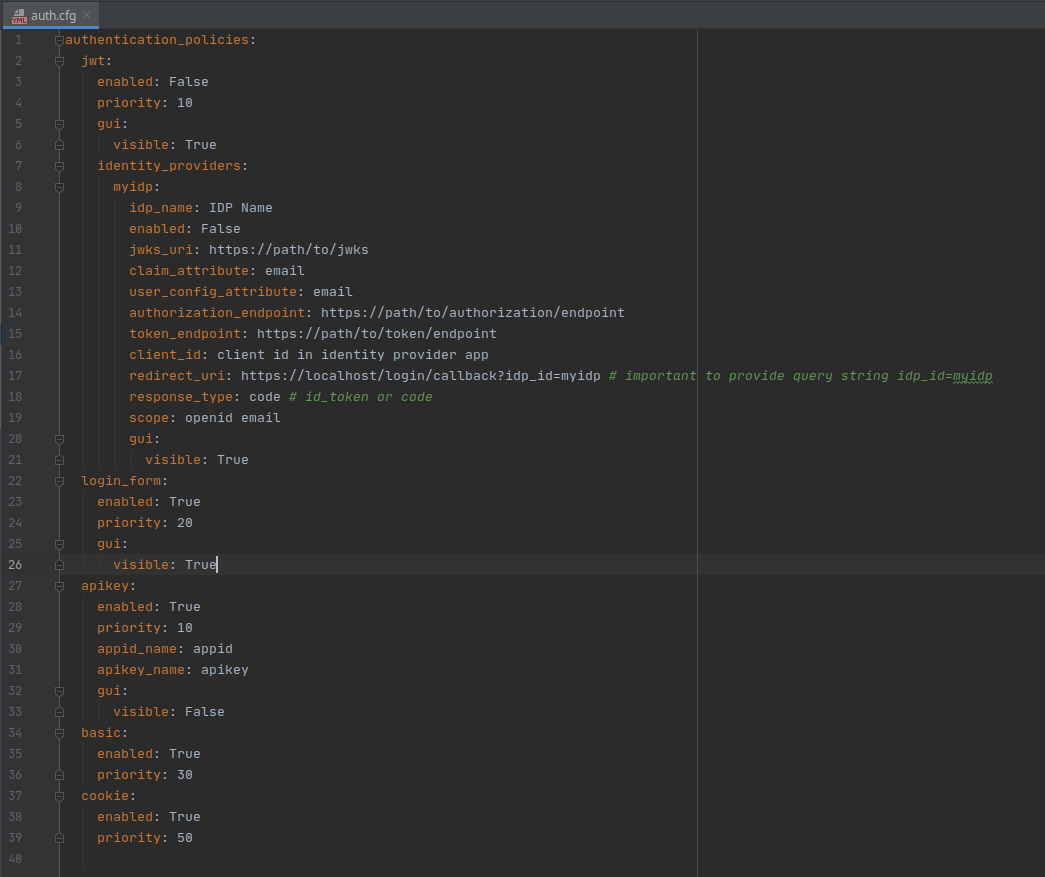
The jwt section has to be enabled and identity providers must be configured properly
jwt:
  enabled: True
  priority: 10
  gui:
    visible: True
  identity_providers:
    myidp:
      idp_name: IDP Name
      enabled: False
      jwks_uri: https://path/to/jwks
      claim_attribute: email
      user_config_attribute: email
      authorization_endpoint: https://path/to/authorization/endpoint
      token_endpoint: https://path/to/token/endpoint
      client_id: client id in identity provider app
      redirect_uri: https://localhost/login/callback?idp_id=myidp # important to provide query string idp_id=myidp
      response_type: code # id_token or code
      scope: openid email
      gui:
        visible: True
Properties of jwt authentication policy:
- enabled is a switch to enable jwt authentication. Accepts values
TrueorFalse. - priority is a priority of the authentication policy in which the request is checked.
Lower number is higher priority. Priority
1means it will be the first authentication policy to check. - gui is a sub-section with properties for configuring GUI on the login page:
- visible is a switch to show or hide authentication policy on the login page.
Accepts values
TrueorFalse.
- visible is a switch to show or hide authentication policy on the login page.
Accepts values
identity providers is a sub-section for configuring identity providers (IDP):
myidp is a unique ID of the IDP. Allowed characters are ASCII letters
a-z, uppercaseA-Z, digits0-9and characters:@,_,~(tilde) and-(dash). Creates a sub-section of properties for the IDP:- idp_name is a full name of the IDP that appears in GUI,
- enabled is a switch to enable authenticating with the IDP,
- jwks_uri is a URL or path to file with JWSK on the server in JSON format. JWKS contains a set of public keys that will be used to verify signature in JWT.
- claim_attribute is a property of the ID Token that will be used to match with attribute of the SlashDB user configuration e.g. email from ID Token is searched among emails used in SlashDB user configurations to pick right user and his privileges.
- authorization_endpoint is a URL of the IDP that is used in OpenID Connect protocol
to receive Authorization Code (when response_type is
code) or ID Token (when response_type isid_token). - token_endpoint is a URL of the IDP that is used to receive tokens,
- client_id is a unique ID created by the IDP to identify the application,
redirect_uri is a redirect URI required by OpenID Connect protocol for returning Authorization Code or ID Token. You'll have to:
- set your own domain e.g.
https://slashdb.my-server.com, - keep the path as is
/login/callback - append query string with the unique ID of the IDP e.g.
?idp_id=myidp
The full redirect_uri could look like:
https://slashdb.my-server.com/login/callback?idp_id=myidp- set your own domain e.g.
- response_type defines what type of OpenID Connect flow should be used with the IDP, use:
codefor Authorization Code Flow with Proof Key for Code Exchange (PKCE)id_tokenfor Implicit Flow
- scope are names of IDP scopes that will be providing required information pieces in token
- gui is a sub-section with properties for GUI regarding certain IDP
- visible is a switch to show or hide the button for signing in with that IDP.
For example configuration of Okta service:
After making changes restart SlashDB.
sudo systemctl restart slashdb
If SlashDB doesn't start it probably means the auth.cfg file is invalid after changes.
Check logs at /var/log/slashdb/slashdb.log for any errors regarding authentication policies.
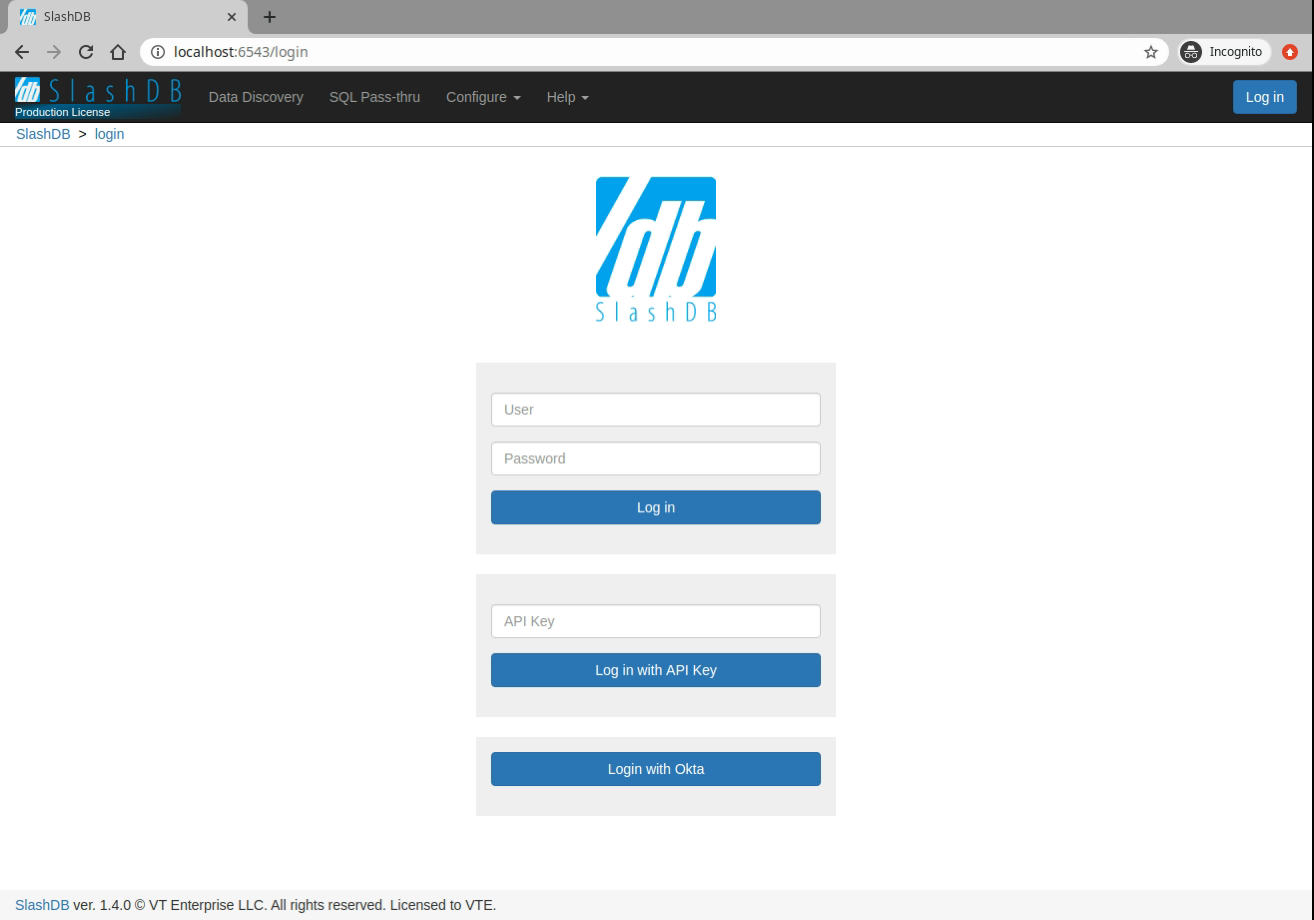
Log in using Single Sign On
Go to page /login. New section is added with separate button for each configured
identity provider.
Authorize request with JWT token
A request from REST client can authorized by validating headers:
X-Identity-Provider-Idwith ID of the Identity Provider that is configured in/etc/slashdb/auth.cfgAuthorizationwithBearerwith ID Token in a form of JWT
for example
curl -i 'http://localhost/db.json' \
-H 'X-Identity-Provider-ID: okta' \
-H 'Authorization: Bearer ZXlKcmFXUWlPaUpRYTBoVU1YSnJUalpEY1MxWlFXaENXWEpNWWtsblMwOXZWRVZyVlMxaWNVTjBiMlpNYmxWQ1QwdFpJaXdpWVd4bklqb2lVbE15TlRZaWZRLmV5SnpkV0lpT2lJd01IVmtZMlpyTTJsd2RtNTRVakpTV2pWa05pSXNJbVZ0WVdsc0lqb2lhbTlvYmk1MGRYUnZjbWxoYkVCbmFYUmlhWFF1Y0d3aUxDSjJaWElpT2pFc0ltbHpjeUk2SW1oMGRIQnpPaTh2WjJsMFltbDBMbTlyZEdFdVkyOXRJaXdpWVhWa0lqb2lNRzloWkdOaGMyTmpUMmR2V0hSaU5YWTFaRFlpTENKcFlYUWlPakUyTVRjd01EZ3dNelVzSW1WNGNDSTZNVFl4TnpBeE1UWXpOU3dpYW5ScElqb2lTVVF1UWxCRlNFVkdXV3hsUlU1MU9USndkRFoxWTFKRFExTXdWekJFY1cxRGVGWkVSWGRCYm5jMFoxQXpZeUlzSW1GdGNpSTZXeUp3ZDJRaVhTd2lhV1J3SWpvaU1EQnZaR00xWjJab1JHTXhPSGhJYzFBMVpEWWlMQ0p1YjI1alpTSTZJakEzYm5wa05DNXZTSFZ3YzJaWVNVSXRkRVZzUlMxc2RIUlNTRWQzVTBaS2VUZEljWEZ3ZHpsMVZWOVFSVkJqWXpodlUxSkRkRVJOTG0xLWIxODRjR3gwVkcxTGRXSm1NalJyWTNGc1ltRXpZbHBPVFV3eVJESjVZaTVrZVZvNGVGcE5lREphTGtaMk5UbHlTMzVwTG5aUmJqbFBWRk5SVDFBM2JsUldOVUpHSWl3aVlYVjBhRjkwYVcxbElqb3hOakUzTURBNE1ETXpMQ0poZEY5b1lYTm9Jam9pTlV0dVRqaHdYME5RT1ZwSVMxOWpRa2hmWkdKRFFTSjkuQjZuc3FVeDZzUXgyTWVHR1JYSWZ5ZncyNFFyVmhhb1JUZWFiNjM3Qnp4a3JDYlZEeUlxUUREWm9ZVE5NcHh1OFg3MFY3X0UyZ0tHU2JCT1N5U3VTTzNtQjZsUnZnS0E2QVhERmc2aC13STRydUNsZno1OEpYd3lPZW03MU1ISmF6dE9XYkhuSWFGNlJLRzRWTUNmaDRlcVlzaGRvcURQMFVpV1ZtU0RzYUhvUVRHQWVFaVpZV0hZU1RWbkVvb3puVVFxUFNsVktYWW84V3Z0U0NhVUwyY3YyREh3d0dzeFc1dFRjeE1HWjhzajRvTC1PVkN3c29zX3BXM1VrNDZoMVhiMEZ2aFUwUHZ2WXdzX0NhTklTZ3YtUXdTTUtRTEpab0lsWDR3V0NhenNPYUlxS0pTaTVNX2tYT1F6OTQzTF9ENzRONkhucHZ3MmQwN00yTGNnY3p3' \

HTTP/1.1 200 OK
Server: nginx
Date: Mon, 29 Mar 2021 09:07:48 GMT
Content-Type: application/json
Content-Length: 544
Connection: keep-alive

[
    {
        "db_id": "Chinook",
        "__href": "/db/Chinook.json",
        "type": "sqlite",
        "description": "Example SQLite database",
        "status": "Disconnected"
    },
    {
        "db_id": "Northwind",
        "__href": "/db/Northwind.json",
        "type": "mssql",
        "description": "MS Sample Database",
        "status": "Connected"
    },
    {
        "db_id": "mysqlChinook",
        "__href": "/db/mysqlChinook.json",
        "type": "mysql",
        "description": "",
        "status": "Connected"
    }
]
API Key
There are two types of api keys available in SlashDB:
- single parameter (apikey)
- two parameters (appid and apikey)
The API key identifies and authenticates request to access SlashDB on behalf of certain SlashDB user. The API key has to be sent either in header or in query string of each request.
When valid API key is used for html format e.g. when using browser a cookie will be sent in response and browser will keep user logged in.
The name of the header and query string argument can be changed in SlashDB ini file /etc/slashdb/slashdb.ini. More on that here.
The API key is configured in User Configuration.
Single parameter API key
Probably the easiest way to authenticate is by sending single parameter API key.
Request with API key in header - Access granted
curl -i 'http://localhost/db/Chinook2.json' \
-H 'apikey: q7afxhxmyetbbq0ufi4bus82gglmzr0u'

HTTP/1.1 200 OK
Request with API key in query string - Access granted
curl -i 'http://localhost/db/Chinook2.json?apikey=q7afxhxmyetbbq0ufi4bus82gglmzr0u'

HTTP/1.1 200 OK
Two parameters API key
SlashDB also allows a two parameters credentials in this authentication method - app id and api key. This may come handy when integrating with API management systems like Red Hat 3scale API Management. By default header and query string argument would be:
- appid - identifies certain application
- apikey - secret for the application
Request with API key in header - Access granted
curl -i 'http://localhost/db/Chinook2.json' \
-H 'appid: app1ABC' \
-H 'apikey: q7afxhxmyetbbq0ufi4bus82gglmzr0u'

HTTP/1.1 200 OK
Request with API key in query string - Access granted
curl -i 'http://localhost/db/Chinook2.json?appid=app1ABC&apikey=q7afxhxmyetbbq0ufi4bus82gglmzr0u'

HTTP/1.1 200 OK
Basic Authentication
SlashDB supports Basic Authentication simply add the header with encoded user name and password.
curl -i 'http://localhost/db.json' \
-H 'Authorization: Basic YWRtaW46YWRtaW4='

HTTP/1.1 200 OK
Cookie Session
Cookies are mostly used by browsers for GUI to keep users logged in. A cookie is sent to the browser after successful authentication.
Cookie session configuration
In SlashDB configuration file /etc/slashdb/slashdb.ini we have several parameters
to tune up sessions and cookies.
- memcached_server is server host and port e.g.
127.0.0.1:11211of Memached server that is used for keeping processes and nodes sychronized. - session.secret takes part in encryption of the session cookie. Should be unique and random. Instances in the cluster should have the same secret.
- session.timeout is number of seconds after which inactive user is logged out, by default 3600s (1 hour).
- cookie_max_age is number of seconds after which a cookie is valid and the session is invalidated too, by default 86400s (1 day).
- cookie_http_only sets cookie
httpOnlyflag.TrueorFalse, by defualtTrue - cookie_secure sets cookie
secureflag.True,Falseorauto, by defaultauto. When set toautothen cookie flag is set when it's request is using HTTPS. session.type is a type how session is stored:
cookiesession information is stored client-side - in user's browserfilesession information is stored server-side in file system. Only session id in user's browser.ext:memcachedsession information is stored server-side in shared Memcached. Only session id in user's browser.
By default, if memcached_server is defined then
ext:memcachedelsefile.- session.url is Memcached server location, by default takes value from memcached_server
- session.data_dir is a path to the folder where session files are stored, by default
/var/lib/slashdb/sessions/data. Option valid when memacahed_server is undefined or session.type isfile. - session.lock_dir is a lock used to ensure that multiple processes/threads are not attempting to make changes in stored sessions.
Server-side session
The session information is kept in the backend in files or shared memory memcached. A cookie that is sent to the client contains only session id. This is more secure and allows to invalidate sessions by system administrator.
For single process setup it's fine to keep sessions in file system.
Update the /etc/slashdb/slashdb.ini accordingly:
For multi-process or multi-node setup session must be kept in memcache.
Update the /etc/slashdb/slashdb.ini accordingly:
# Memcached server
memcached_server = 127.0.0.1:11211

# IMPORTANT: Please generate a new secret key for this SlashDB instance.
# Instances running in a cluster should have the same secret key.
# Keep the secret key used in production secret!
session.secret = 84eXRmVUdsMCRzSDycbLEQmej8wKRR

# How long a session is valid in sec.
session.timeout = 3600

# How long a cookie is valid in sec.
cookie_max_age = 86400

# Cookie httpOnly and secure flags
cookie_http_only = True
cookie_secure = auto
Client-side session
The session information is encrypted in the cookie and the cookie is systematically substituted to extend the user's session. The backend is not involved in keeping the session which is easier setup for multi-process or multi-node setup but it's not possible to invalidate cookie until it expires.
# IMPORTANT: Please generate a new secret key for this SlashDB instance.
# Instances running in a cluster should have the same secret key.
# Keep the secret key used in production secret!
session.secret = 84eXRmVUdsMCRzSDycbLEQmej8wKRR

# How long a session is valid in sec.
session.timeout = 3600

# How long a cookie is valid in sec.
cookie_max_age = 86400

# Cookie httpOnly and secure flags
cookie_http_only = True
cookie_secure = auto
Authenticate to receive the session cookie
Credentials sent as JSON
curl -i -X POST 'http://localhost/login' \
-H "Content-Type:application/json" \
-d '{"login": "admin", "password": "admin"}'
The response will be a 200 OK and will contain Set-Cookie
HTTP/1.1 200 OK
Set-Cookie: auth_tkt=a34e5f0535fada973074a68ec5eb855b5a0af71fYWRtaW4%3D!userid_type:b64unicode; Max-Age=3600; Path=/; expires=Tue, 14-Nov-2017 15:01:03 GMT
Making requests with a cookie
Having a cookie, you can use it for requests within the session
curl -i 'http://localhost/db.json' \
-H 'Accept: application/json' \
-H 'Cookie: auth_tkt=c7e39bdd4e670d796e506ac5ddab8ba95a0af9b9YWRtaW4%3D!userid_type:b64unicode'
Ending cookie session
To end the session send a GET request to /logout. Then remove/invalidate the cookie in your application.
curl -i 'http://localhost/logout' \
-H 'Cookie: auth_tkt=c7e39bdd4e670d796e506ac5ddab8ba95a0af9b9YWRtaW4%3D!userid_type:b64unicode'
Authenticating proxy
URLs in SlashDB are unique references to data. As a result optionally we can integrate the API service with an authorization system that would decide if incoming request should be sent to SlashDB. Solutions like that are typically implemented using authenticating proxies in conjunction with single sign-on and entitlement systems. If you require this level of integration please contact us.
Public Access
For situations when we would like to give an open access to the API we can create/edit the SlashDB user "public".
Requests identified as "public" do not require any method of authentication. Consequently, requests, which do not contain any authentication credentials will be assigned the identity (and authorizations) of user public.
To disable public access, remove that user from SlashDB or limit his permissions in User Configuration
Logging in using the GUI
User can explore resources in SlashDB using a browser but first he has to log in.
Standard login page
Out of the box SlashDB has standard login page that supports logging in using:
- login and password submitted in the form
- Single Sign On
- API Key
The visibility of authentication methods on the log in page can be adjusted in
configuration file /etc/slashdb/auth.cfg. A chosen authentication method can
be switched on or off with parameter enabled set to True or False.
If the authentication method is enabled then its visibility can be controlled
in section gui by setting parameter visible to True or False.
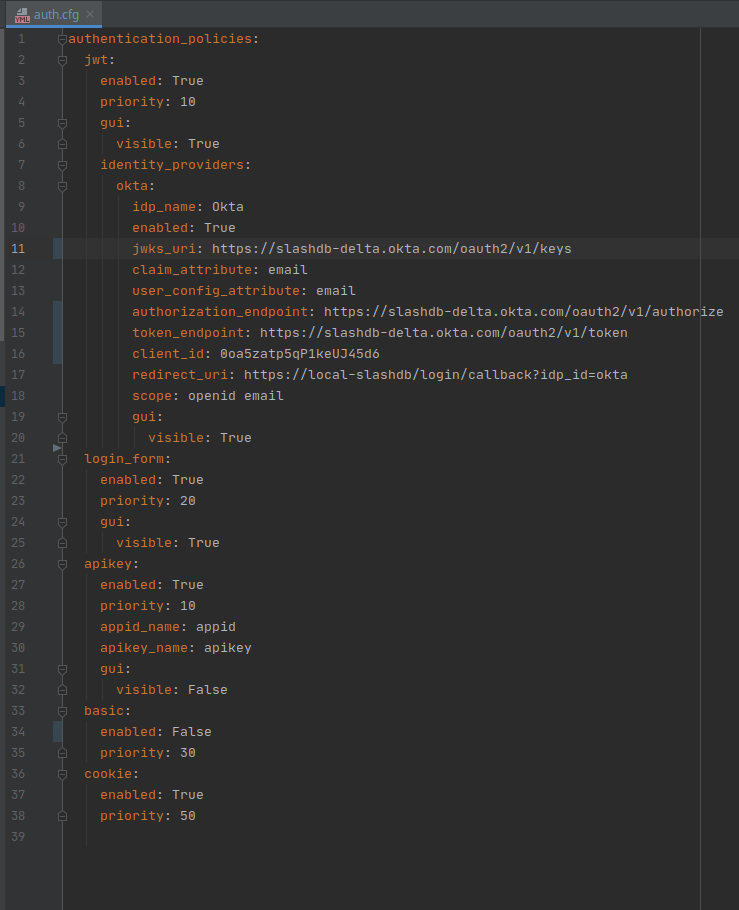
For example in auth.cfg
authentication_policies:
  jwt:
    enabled: True
    priority: 10
    gui:
      visible: True
    identity_providers:
      okta:
        idp_name: Okta
        enabled: True
        jwks_uri: https://gitbit.okta.com/oauth2/v1/keys
        claim_attribute: email
        user_config_attribute: email
        authorization_endpoint: https://gitbit.okta.com/oauth2/v1/authorize
        token_endpoint: https://gitbit.okta.com/oauth2/v1/token
        client_id: 0oadcasccOgoXtb5v5d6
        redirect_uri: https://demo.slashdb.com/login/callback?idp_id=okta
        response_type: code # id_token or code
        scope: openid email
        gui:
          visible: True
  login_form:
    enabled: True
    priority: 20
    gui:
      visible: True
  apikey:
    enabled: True
    priority: 10
    appid_name: appid
    apikey_name: apikey
    gui:
      visible: False
  basic:
    enabled: True
    priority: 30
  cookie:
    enabled: True
    priority: 50
authentication_policies
- jwt
- enabled
Truemeans SlashDB will be validating token inAuthorizationheader - gui
- visible
Truemeans to show Single Sign On section in standard login page
- visible
- identity_providers
- okta
- enabled
Truemeans that requests with JWT can be identified with this identity providerokta - gui
- visible
Truemeans that a Single Sign On button for identity provideroktawill show up in standard login page
- visible
- enabled
- okta
- enabled
- login_form
- enabled
Truemeans it is possible to authenticate by sending login and password to/loginendpoint. - gui
- vibisle
Truemeans the login form will appear in the login page
- vibisle
- enabled
- apikey
- enabled
Truemeans it is possible to authenticate with API Key - gui
- visible
Falsemeans that a form to log in with API Key won't show up in standrd login page
- visible
- enabled
basic
- enabled means SlashDB will be checking login and password as Basic Authentication
sent in
Authorizationheader
There is no gui section in for basic authentication.
- enabled means SlashDB will be checking login and password as Basic Authentication
sent in
cookie:
- enabled means SlashDB will be checking session id from cookie sent with request
There is no gui section in for basic authentication.
- jwt
Customized login page
This feature is available only in Enterprise Edition
SlashDB allows to create custom login pages. To find out please contact your SlashDB technical support.
Authorization
SlashDB users can be granted permissions to:
Personal Information
The very basic authorization is to the API (and GUI) and some of the account information.
A user who knows credentials and has not been granted any permissions is able to access only his own user configuration and change only some of those settings: password, API key, full name, email.
For example user john makes a GET request for his user information using API. Request is authenticated by passing john's ApiKey.
curl -i "https//localhost/userdef/john.json" \
-H "apikey: 3pewxln1nnrm3lcz04vuj0rmisveya6q"
or viewing it in GUI by clicking on user's name (john) in upper right corner and selecting settings from dropdown menu
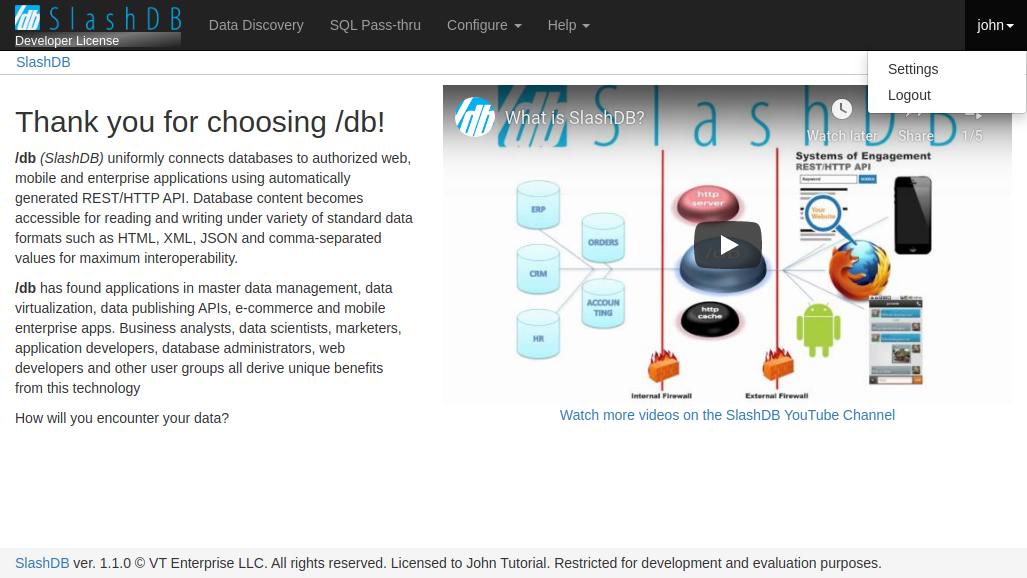
to show with modal with user's information.
Data
As described in the intro at the top of this document, access to data for each user is determined by database mappings.
By mapping SlashDB users to actual database logins:
- we leverage security mechanisms which are built into databases (GRANT, GROUPS, ROLES etc.),
- each SlashDB account can have different effective privileges on database objects (e.g. only SELECT),
- we avoid maintenance of complicated logic of permissions to resources in the API.
These mappings are configured on the User Configuration screen.
Access to data via Data Discovery
Authenticated SlashDB user have access only to databases that were set in the user's database mappings and only those databases will be listed on the Data Discovery home page /db.
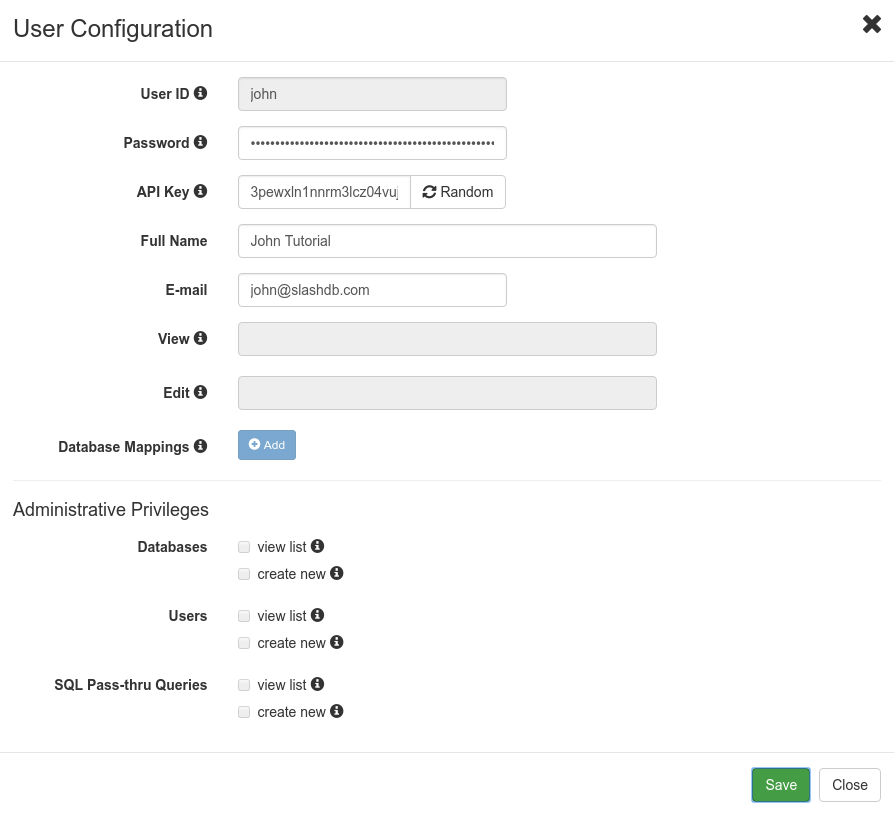
Example
Let's give "mike" only read permission by mapping him to database login "ro_hr" that is granted only SELECT.
MySQL "ro_hr" login
SlashDB user "mike"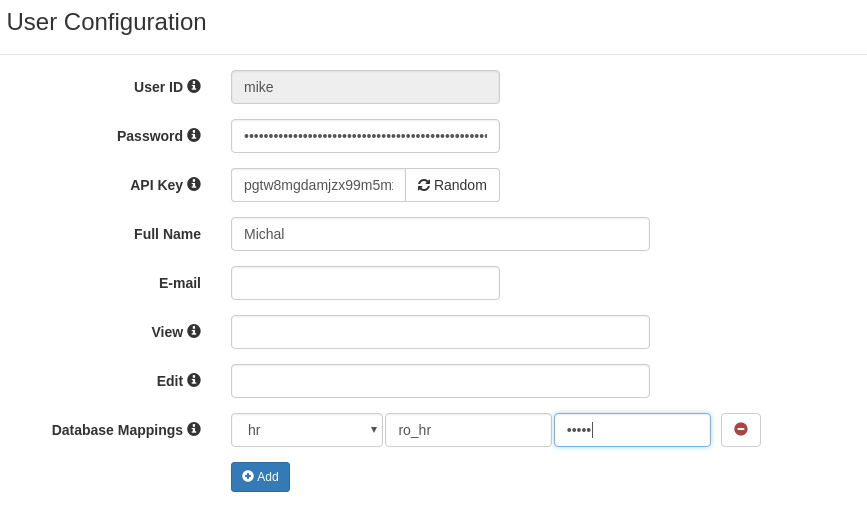
We can get data with no problem.
curl -i 'http://localhost/db/hr/departments.json' -H 'apikey: pgtw8mgdamjzx99m5mxf8sfeipwkdw0u'
HTTP/1.1 200 OK
But we can't create and we get explanation of the problem in header "Warning" and in the body of the response.
curl -i -X POST 'http://localhost/db/hr/departments.json' \
-H 'apikey: pgtw8mgdamjzx99m5mxf8sfeipwkdw0u' \
-d '{"dept_name": "New Dept", "dept_no": "d020"}'

HTTP/1.1 404 Not Found
Warning: (_mysql_exceptions.OperationalError) (1142, "INSERT command denied to user 'ro_hr'@'pc140.home' for table 'departments'")

{"http_code": 404, "description": "(_mysql_exceptions.OperationalError) (1142, \"INSERT command denied to user 'ro_hr'@'pc140.home' for table 'departments'\")"}
Access to data via SQL Pass-Thru
Two levels of authorization have to be configured to execute query:
The user must be allowed to execute the query. When we want to execute query Query Configuration we can define list of users allowed to execute SQL Pass-Thru query.
Database login that will be used to execute query in database must have right privileges.
SlashDB Configurations
SlashDB contains database, user and SQL Pass-Thru query configurations. Typically modifying those is restricted to user "admin", but regular users can be given permission to access and modify those settings too. These are particularly useful if you need to create one or more power user with certain administrative privileges granted to them.
In Database Configuration we can:
- allow users to view/edit specific database definition
- allow users to connect/disconnect specific database
In User Configuration we can:
- allow other users to view/edit the specific user configuration
- allow the user to view list of databases, users, SQL Pass-Thru queries
- allow the user to create new databases, users and SQL Pass-Thru queries
In Query Configuration we can:
- allow users to view/edit the query configuration
- allow users to run the SQL Pass-Thru query
Special accounts
admin
User "admin" is a superuser of SlashDB and is not limited by any rules with regards to configuration. Still to access data the "admin" user has to be mapped to database logins just like a regular user does.
public
SlashDB treats unauthenticated requests as user "public" and we can set grants for that user as any other user using User Configuration.
For example let's give public user access to Chinook database.
Requests that do not provide any authentication will identified as user public.
User public has only mapping for Chinook database thus we'll find only the Chinook on list of available databases.
curl -i 'http://localhost/db.json'

HTTP/1.1 200 OK
{
    "Chinook": "/db/Chinook.json",
    "__href": "/db.json"
}
When we remove Database Mapping for Chinook we receive 404 Not Found.
curl -i 'http://localhost/db.json'

HTTP/1.1 404 Not Found
Warning: No models for user public.

{"http_code": 404, "description": "No models for user public."}
And if we remove user public completely we'll get 403 Forbidden.
curl -i 'http://localhost/db.json'

HTTP/1.1 403 Forbidden
Warning: Access was denied to this resource. Please log in with your username/password or resend your request with a valid API key.

{"http_code": 403, "description": "Access was denied to this resource. Please log in with your username/password or resend your request with a valid API key."}
Failed Authentication
Whenever a request cannot be assigned to a certain SlashDB user or that user is not authorized to access the resource a HTTP 403 Forbidden response is returned.
- 403 Forbidden
- response header Warning contains error message
- response body contains HTTP status code and description is the same format as request e.g. JSON
curl -i "https://localhost/userdef/admin.json"


HTTP/1.1 403 Forbidden
Server: nginx/1.12.2
Date: Mon, 23 Sep 2019 08:56:41 GMT
Content-Type: application/json
Content-Length: 159
Connection: keep-alive
Warning: Access was denied to this resource. Please log in with your username/password or resend your request with a valid API key.

{"http_code": 403, "description": "Access was denied to this resource. Please log in with your username/password or resend your request with a valid API key."}
More information about status codes can be found in sections about Client Errors and Server Errors.
HTTPS/SSL
HTTPS provides authentication of the web server and encryption of communication between client and server. It's strongly recommended to use it especially that it's easily configurable for SlashDB.
To enable HTTP Secure you will require a private key and a signed certificate and access to instance of SlashDB via SSH. For testing or development purposes only you may generate a self-signed certificate.
Creating self-signed SSL certificate
Run below command to create self signed key and certificate and save them in /etc/slashdb directory
sudo openssl req -x509 -nodes -days 365 -newkey rsa:2048 \
-keyout /etc/slashdb/nginx-selfsigned.key \
-out /etc/slashdb/nginx-selfsigned.crt
Configuring HTTPS in NGINX
Add NGINX directives listen, ssl_certificate and ssl_certificate_key to NGINX configuration file /etc/slashdb/nginx.conf.
server {
    listen 80;
    listen 443 ssl;
    server_name your-slashdb-domain.com;
    ssl_certificate /etc/slashdb/nginx-selfsigned.crt;
    ssl_certificate_key /etc/slashdb/nginx-selfsigned.key;
}
It's a good practice to redirect traffic from HTTP to HTTPS. To do so create additional:
- server in NGINX config that returns 301 Moved Permanently that points to HTTPS URL
- comment out
listen 80on server with HTTPS
server {
    listen 80;
    server_name your-slashdb-domain.com;
    return 301 https://$host$request_uri;
}

server {
    #listen 80;
    listen 443 ssl;
    server_name your-slashdb-domain.com;
    ssl_certificate /etc/slashdb/nginx-selfsigned.crt;
    ssl_certificate_key /etc/slashdb/nginx-selfsigned.key;

    location ~ /db*|/query* {
       uwsgi_pass              slashdb_app;
       include                 uwsgi_params;
    }
}
NGINX server restart is needed to apply changes
sudo /etc/init.d/nginx restart`
It's also important to remember to allow inbound traffic on port 443 especially for Microsoft Azure or Amazon EC2
More detail about using instructions on enabling HTTPS can be found in this tutorial
Cross-Origin Resource Sharing (CORS)
CORS mechanism allows to control which origin (domains) are accepted by SlashDB server and what HTTP methods and headers are exposed to those domains.
Those rules can be configured in SlashDB ini settings file /etc/slashdb/slashdb.ini in section [filter:cors]. By default SlashDB comes with free policy which allows traffic from any domain.
[filter:cors]
use = egg:wsgicors#middleware
# CORS available policies
# "free" policy
free_origin=copy
free_headers=*
free_expose_headers=Set-Cookie, Warning
free_methods=HEAD, OPTIONS, GET, POST, PUT, DELETE
free_maxage=180
free_credentials=true

# CORS enabled policies
policy=free
Please refer to wsgicors documentation for details on setting up CORS policies.