Authentication
Out of the box, SlashDB supports several common authentication methods:
- Single Sign On (SSO) with OpenID or SAML
- API Key
- HTTP Basic Authentication
- Browser usernames and passwords
- Cookie Session
- Public (unauthenticated) access
Other methods can be added to SlashDB using custom WSGI middleware, or by making SlashDB an endpoint behind a third-party authentication system.
SSO / OpenID Connect
Important
This feature is only available in Enterprise Edition
OpenID Connect is an authentication layer on top of the OAuth 2.0 authorization framework.
Authentication functionality can be delegated to Identity Providers like
- MS Azure AD
- Okta
- other products that implement OpenID Connect
Info
The SlashDB authentication flow for a login request via OpenID:
- read the value of the ID Token (a JSON Web Token, JWT) in the
Authorizationheader - read the value of the identity provider ID in the
X-Identity-Provider-Idheader - verify the token and its signature with the identity provider
- find the associated SlashDB user account by comparing the value of the claim of the token with
the attribute in the user config e.g.
id token email == user config email - validates user has permissions for the requested resource
When the process successfully completes, a response with a resource is returned. When requesting resources in
HTML format, a Set-Cookie header is sent to the client to create a browser session.
Setup
Caution
OpenID setup requires manual editing of configuration files. Ensure you have backups of those files before proceeding.
Install a SlashDB License that allows Single Sign-On (SSO) with OpenID Connect using JWT.
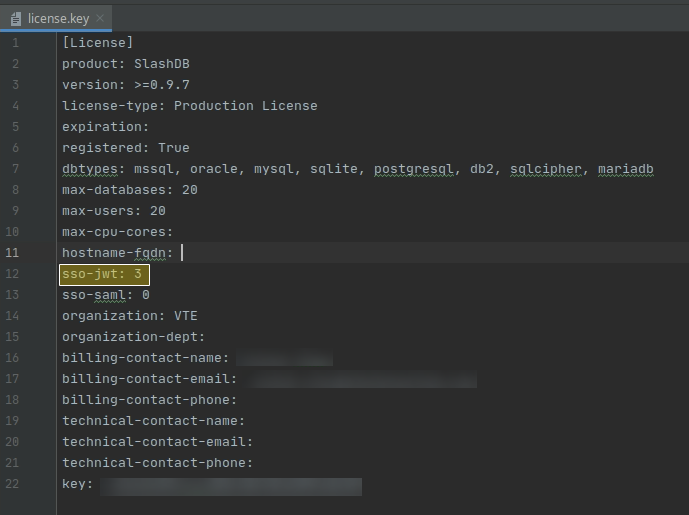
Enable SSO by editing the /etc/slashdb/auth.cfg and configuring identity providers.
Info
By default, the auth.cfg file is shipped with the JWT authentication method disabled.
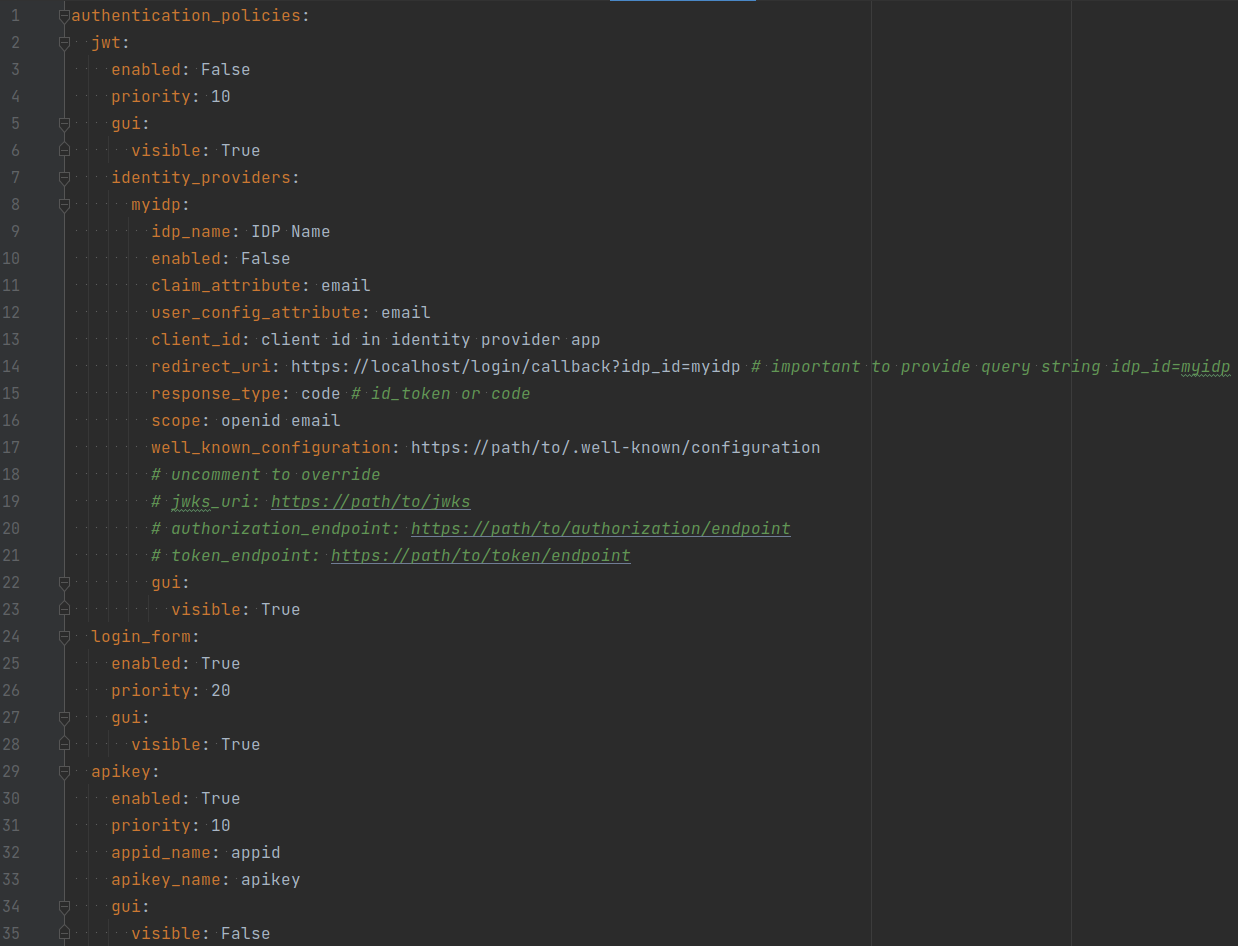
The jwt method must be enabled and identity providers must be configured properly:
jwt:
  enabled: True
  priority: 10
  gui:
    visible: True
  identity_providers:
    myidp:
      idp_name: IdP Name
      enabled: False
      claim_attribute: email
      user_config_attribute: email
      client_id: client id in identity provider app
      redirect_uri: https://slashdb_host/login/callback?idp_id=myidp # important to provide query string idp_id=myidp
      response_type: code # id_token or code
      scope: openid email
      well_known_configuration: https://path/to/.well-known/configuration
      # uncomment to override
      # jwks_uri: https://path/to/jwks
      # authorization_endpoint: https://path/to/authorization/endpoint
      # token_endpoint: https://path/to/token/endpoint
      gui:
        visible: True
In the section identity_providers, configure each identity provider that should allow SSO with JWT as follows:
- replace the
my_idpkey with a user-specified unique value for the identity provider ID - set the
idp_namekey to a user-friendly name e.g. "My Azure IdP" - set
enabledtoTrue - set
client_idfrom IdP - set the
redirect_urito your SlashDB hostname and replace themyidpstring with the actual IdP ID - set
well_known_configurationto the URL where the IdP configuration can be found or the path to a configuration file on the server. If a URL is used, it must be reachable from the back end. Alternatively, manually setjwks_uri,authorization_endpoint,token_endpoint
Configure cross-origin request policy (CORS) to allow requests to the IdP domain.
In the identity provider configuration console:
- set scope to
openid email. Alternatively, configureclaim_attribute: emailanduser_config_attribute: emailaccordingly - set the redirect URL to the same value as
redirect_uri
Important
Ensure that users logging in with JWT have email addresses in SlashDB that correspond to their email addresses configured on the identity provider.
Restart slashdb and log in using the button with the idp_name key you set earlier e.g. "My Azure IdP".
JWT Configuration Properties
Expand to see configuration properties
- enabled is a switch to enable JWT authentication. Accepted values are
trueorfalse. - priority is the priority given to the JWT authentication method as compared to other configured methods.
A lower number signifies higher priority; e.g. a priority value of
1means it will be the first authentication method to try. - gui is a sub-section with properties for configuring the GUI on the login page:
- visible is a switch to show or hide the OpenID login form on the login page.
Accepted values are
trueorfalse.
- visible is a switch to show or hide the OpenID login form on the login page.
Accepted values are
- identity providers is a sub-section for configuring identity providers (IdP):
-
- idp_name is the full name of the IdP that appears in the GUI
- enabled is a switch to enable authenticating with the IdP
- well_known_configuration is a URL or path to a local file with a IdP configuration in JSON format
- jwks_uri is a URL or path to a local file with a JSON Web Key Set (JWKS) in JSON format. JWKS is a set of public keys that will be used to verify signature in the JWT.
- claim_attribute is a property of the ID Token that will be used to find the associated SlashDB user account (see
user_config_attributebelow) to validate an authentication request; e.g. an email address in the ID Token must match an email address for a SlashDB user account to identify the SlashDB user the OpenID account is associated with. - user_config_attribute is a property of SlashDB User Configuration to be compared with the
claim_attributeproperty for matching an OpenID account with a SlashDB user. Typically, the value will beemail. - authorization_endpoint is the URL of the IdP that is used in the OpenID Connect protocol
to receive an Authorization Code (when response_type is
code) or ID Token (when response_type isid_token). - token_endpoint is the URL of the IdP that is used to receive tokens.
- client_id is a unique ID created by the IdP to identify the application.
-
- Hostname of SlashDB server, e.g.
https://slashdb.my-server.com - append URL string
/login/callback - append query string with the unique ID of the IdP defined previously, e.g.
?idp_id=myidp
redirect_uri is the redirect URI used by OpenID Connect protocol for returning an Authorization Code or ID Token. You must set it as follows:
The full redirect_uri for this example would be:
https://slashdb.my-server.com/login/callback?idp_id=myidp - Hostname of SlashDB server, e.g.
myidp is a unique ID for the IdP. Can consist of ASCII letters
a-z, uppercaseA-Z, digits0-9, characters:@,_,~(tilde) and-(dash). It contains a sub-section of properties for the IdP:- response_type defines what type of OpenID Connect flow should be used with the IdP, use:
codefor Authorization Code Flow with Proof Key for Code Exchange (PKCE)id_tokenfor Implicit Flow
- scope are names of IdP scopes that will contain required claims in the token
- gui is a sub-section with properties for the GUI applicable to this IdP
- visible is a switch to show or hide the button for signing in with this IdP.
-
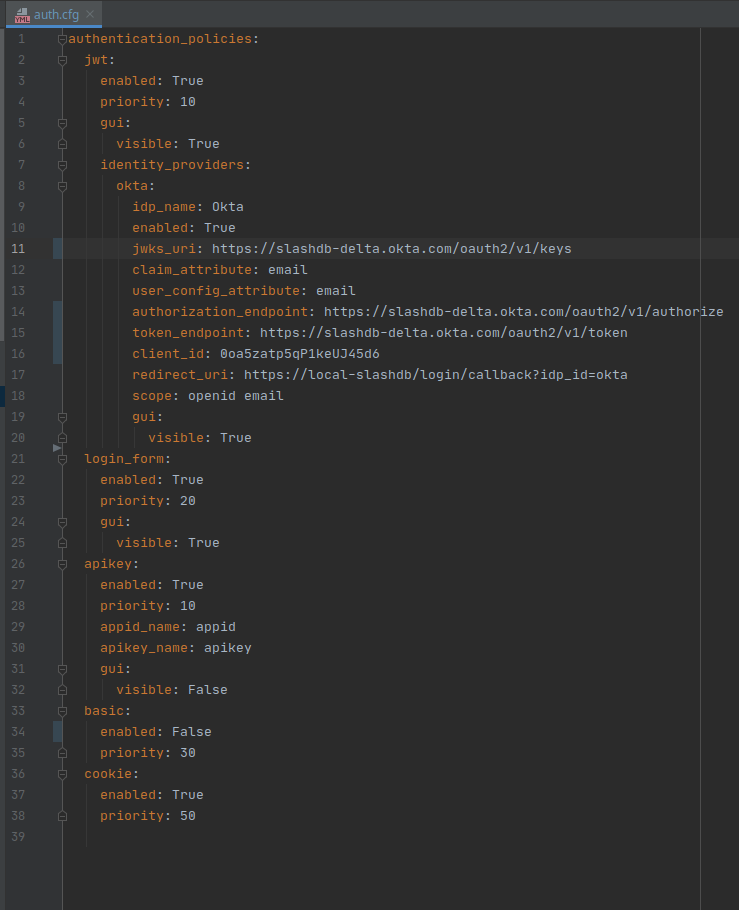
For example, to configure Okta as an IdP:
After making changes, restart SlashDB:
sudo systemctl restart slashdb
If SlashDB doesn't restart, there may be errors in the auth.cfg file that need to be fixed. Check the logs at /var/log/slashdb/slashdb.log to find any errors regarding authentication policies.
Log In
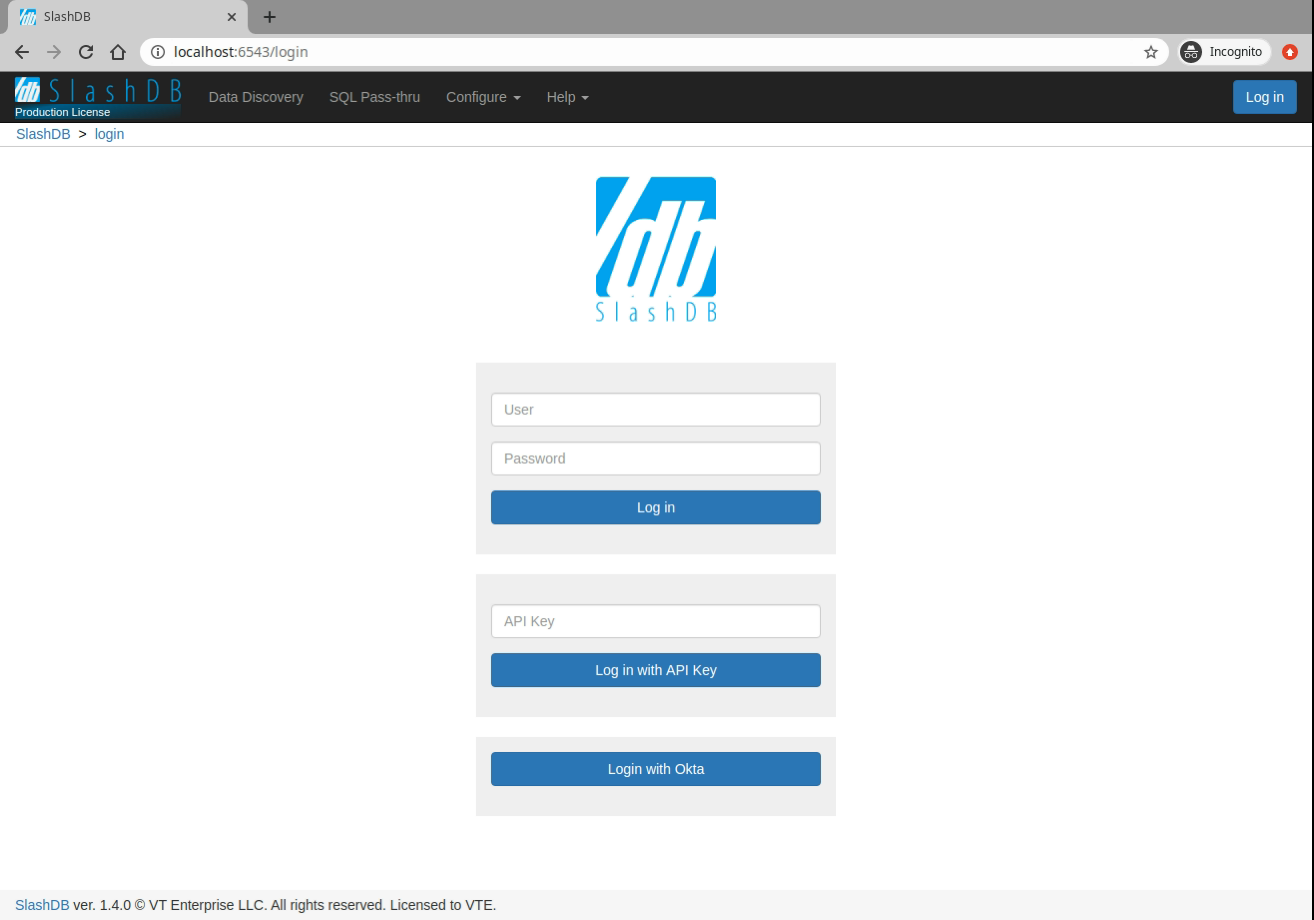
Using a browser, navigate to the SlashDB login URL at /login. There will be a new section in the GUI with a separate button for each configured identity provider.
Authorize Requests
A request from a REST client can be authorized by providing these headers in the request:
X-Identity-Provider-Idwith the ID of an Identity Provider that is configured in/etc/slashdb/auth.cfgAuthorizationwithBearerwith a valid JWT from the Identity Provider specified above
For example:
curl -i 'http://localhost/db.json' \
-H 'X-Identity-Provider-ID: okta' \
-H 'Authorization: Bearer ZXlKcmFXUWlPaUpRYTBoVU1YSnJUalpEY1MxWlFXaENXWEpNWWtsblMwOXZWRVZyVlMxaWNVTjBiMlpNYmxWQ1QwdFpJaXdpWVd4bklqb2lVbE15TlRZaWZRLmV5SnpkV0lpT2lJd01IVmtZMlpyTTJsd2RtNTRVakpTV2pWa05pSXNJbVZ0WVdsc0lqb2lhbTlvYmk1MGRYUnZjbWxoYkVCbmFYUmlhWFF1Y0d3aUxDSjJaWElpT2pFc0ltbHpjeUk2SW1oMGRIQnpPaTh2WjJsMFltbDBMbTlyZEdFdVkyOXRJaXdpWVhWa0lqb2lNRzloWkdOaGMyTmpUMmR2V0hSaU5YWTFaRFlpTENKcFlYUWlPakUyTVRjd01EZ3dNelVzSW1WNGNDSTZNVFl4TnpBeE1UWXpOU3dpYW5ScElqb2lTVVF1UWxCRlNFVkdXV3hsUlU1MU9USndkRFoxWTFKRFExTXdWekJFY1cxRGVGWkVSWGRCYm5jMFoxQXpZeUlzSW1GdGNpSTZXeUp3ZDJRaVhTd2lhV1J3SWpvaU1EQnZaR00xWjJab1JHTXhPSGhJYzFBMVpEWWlMQ0p1YjI1alpTSTZJakEzYm5wa05DNXZTSFZ3YzJaWVNVSXRkRVZzUlMxc2RIUlNTRWQzVTBaS2VUZEljWEZ3ZHpsMVZWOVFSVkJqWXpodlUxSkRkRVJOTG0xLWIxODRjR3gwVkcxTGRXSm1NalJyWTNGc1ltRXpZbHBPVFV3eVJESjVZaTVrZVZvNGVGcE5lREphTGtaMk5UbHlTMzVwTG5aUmJqbFBWRk5SVDFBM2JsUldOVUpHSWl3aVlYVjBhRjkwYVcxbElqb3hOakUzTURBNE1ETXpMQ0poZEY5b1lYTm9Jam9pTlV0dVRqaHdYME5RT1ZwSVMxOWpRa2hmWkdKRFFTSjkuQjZuc3FVeDZzUXgyTWVHR1JYSWZ5ZncyNFFyVmhhb1JUZWFiNjM3Qnp4a3JDYlZEeUlxUUREWm9ZVE5NcHh1OFg3MFY3X0UyZ0tHU2JCT1N5U3VTTzNtQjZsUnZnS0E2QVhERmc2aC13STRydUNsZno1OEpYd3lPZW03MU1ISmF6dE9XYkhuSWFGNlJLRzRWTUNmaDRlcVlzaGRvcURQMFVpV1ZtU0RzYUhvUVRHQWVFaVpZV0hZU1RWbkVvb3puVVFxUFNsVktYWW84V3Z0U0NhVUwyY3YyREh3d0dzeFc1dFRjeE1HWjhzajRvTC1PVkN3c29zX3BXM1VrNDZoMVhiMEZ2aFUwUHZ2WXdzX0NhTklTZ3YtUXdTTUtRTEpab0lsWDR3V0NhenNPYUlxS0pTaTVNX2tYT1F6OTQzTF9ENzRONkhucHZ3MmQwN00yTGNnY3p3' \

HTTP/1.1 200 OK
Server: nginx
Date: Mon, 29 Mar 2021 09:07:48 GMT
Content-Type: application/json
Content-Length: 544
Connection: keep-alive

[
    {
        "db_id": "Chinook",
        "__href": "/db/Chinook.json",
        "type": "sqlite",
        "description": "Example SQLite database",
        "status": "Disconnected"
    },
    {
        "db_id": "Northwind",
        "__href": "/db/Northwind.json",
        "type": "mssql",
        "description": "MS Sample Database",
        "status": "Connected"
    },
    {
        "db_id": "mysqlChinook",
        "__href": "/db/mysqlChinook.json",
        "type": "mysql",
        "description": "",
        "status": "Connected"
    }
]
SSO / SAML 2.0
Important
This feature is only available in Enterprise Edition
SAML 2.0 is a standard for exchanging authentication and authorization information between domains. It allows users to sign in to SlashDB by providing proof of their identity from an Identity Provider like MS Azure AD, Okta, PingOne, Google, or any others that implement the SAML 2.0 standard.
Info
To authenticate a user in SlashDB using SAML 2.0:
- Add Identity Provider configuration details to
/etc/slashdb/auth.cfg. - On the SlashDB login page, click the appropriate button to log in using the Identity Provider.
- The user is redirected to the Identity Provider site where authentication takes place, and then onto a page that automatically sends the SAML response to the SlashDB backend.
- SlashDB verifies the integrity of the SAML response and searches for a matching account in the user database by comparing
saml_auth_attributeanduser_config_attribute. - Assuming valid credentials were provided, the user is logged in and a response with a session cookie is returned. In case of an authentication error, the user is returned to the SlashDB login page.
Setup
Caution
SAML setup requires manual editing of configuration files. Ensure you have backups of those files before proceeding.
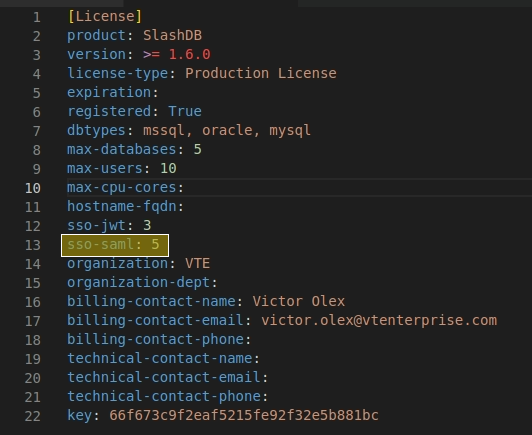
Install a SlashDB License that allows Single Sign-On (SSO) with SAML 2.0.
Enable SAML SSO by editing the file /etc/slashdb/auth.cfg and configuring identity providers.
Info
By default, the auth.cfg file ships with SAML authentication disabled.
In the saml section of the file, set this parameter: enabled: True.
In the section identity_providers, configure each SAML SSO identity provider:
- replace
my_idpkey with a unique identity provider id - give
idp_namea more user friendly name e.g. "My Azure IdP" - set
enabled: True - set the following values in the
spsection:- for
entityId, enter the SlashDB hostname or some other unique value - in the
urlproperty, set actual hostname and replace "my_idp" with the actual identity provider id as configured above
- for
Go to the identity provider configuration console and set the same values for entityId and Assertion Consumer Service (ACS) URL.
Info
Some Identity Providers support importing configuration from Service Provider metadata. In that case it can be found at https://slashdb_host/sso/metadata/saml/my_idp_id.xml
Go back to the auth.cfg file in SlashDB to the identity provider configuration:
- in the
idpsection:- For
metadatause the URL were identity provider metadata can be found or the path to the metadata XML file saved in local file system. If a URL is used, it must be reachable from the backend. - Alternatively, configure the section by setting the
entityId,urlandcertmanually. The values may be found in the metadata xml document.
- For
In the identity provider configuration, set NameID format to email. Alternatively, configure saml_auth_attribute: NameID user_config_attribute: email accordingly.
Important
Ensure that users logging in with SAML have email addresses in SlashDB that correspond to their email addresses configured on the identity provider.
Restart slashdb and log in using the button with the idp_name you set earlier e.g. "My Azure IdP".
In case of errors, navigate to the login page. Do not use the browser back button, go directly to the /login URL, since the SAML response is valid for one use only and a new session needs to be created.
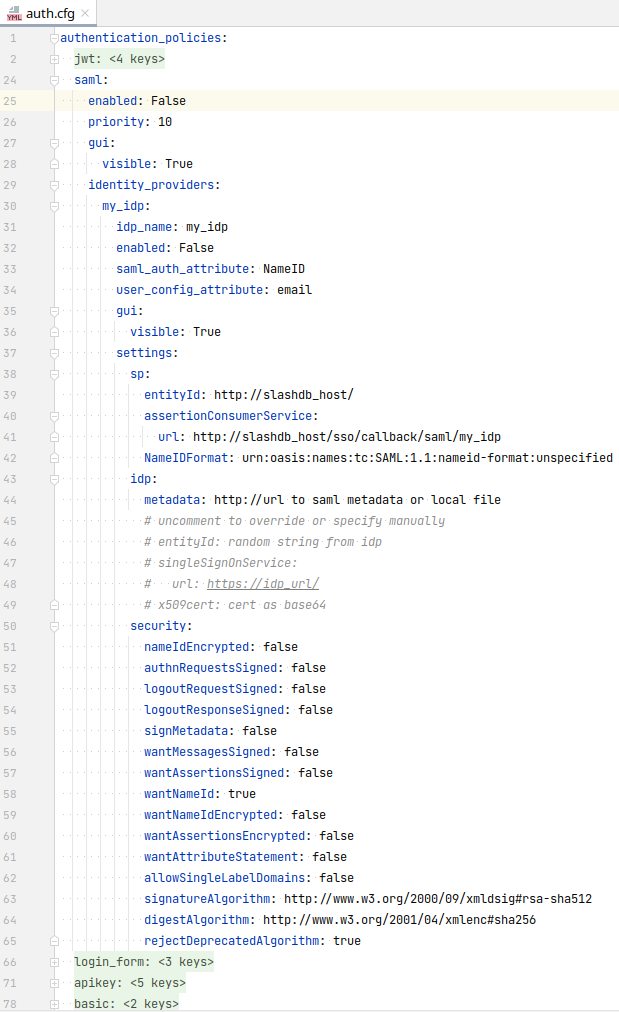
Sample SAML config:
saml:
  enabled: True
  priority: 10
  gui:
    visible: True
  identity_providers:
    my_idp:
      idp_name: my_idp
      enabled: True
      saml_auth_attribute: NameID # case sensitive
      user_config_attribute: email
      gui:
        visible: True
      settings:
        sp:
          entityId: http://slashdb_host/ or other unique string
          assertionConsumerService:
            url: http://slashdb_host/sso/callback/saml/my_idp
          NameIDFormat: urn:oasis:names:tc:SAML:1.1:nameid-format:unspecified
        idp:
          metadata: http://idp_site url to saml metadata autoconfiguration or to local file
          # uncomment next lines to override or for manual setup
          # entityId: unique string from the IdP
          # singleSignOnService:
          #   url: https://idp_url/
          # x509cert: cert as base64
        security:
          nameIdEncrypted: false
          authnRequestsSigned: false
          logoutRequestSigned: false
          logoutResponseSigned: false
          signMetadata: false
          wantMessagesSigned: false
          wantAssertionsSigned: false
          wantNameId: true
          wantNameIdEncrypted: false
          wantAssertionsEncrypted: false
          wantAttributeStatement: false
          allowSingleLabelDomains: false
          signatureAlgorithm: http://www.w3.org/2000/09/xmldsig#rsa-sha512
          digestAlgorithm: http://www.w3.org/2001/04/xmlenc#sha256
          rejectDeprecatedAlgorithm: true
        extra_request_options:
          set_nameid_policy: true
SAML Configuration Properties
Expand to see configuration properties
- enabled is a switch to enable SAML authentication. Accepted values are
trueorfalse. -
priority sets the priority of the SAML authentication policy as compared to other authentication policies. A lower number indicates higher priority. A value of
1will set SAML as the first authentication policy to execute. -
gui is a sub-section with properties for configuring GUI on the login page:
- visible a switch to show or hide the configured SAML Identity Providers
on the login page. Accepted values are
trueorfalse.
- visible a switch to show or hide the configured SAML Identity Providers
on the login page. Accepted values are
- identity_providers is a sub-section for configuring identity providers (IdP)
- my_idp is a unique ID for the IdP. Allowed characters are upper and lowercase
A-z, digits0-9and characters:@,_,~(tilde) and-(dash). Note – this value is used as part of the url property configured in theassertionConsumerServicesub-section. This value also contains a sub-section of properties for the IdP. - idp_name is the full name of the IdP that appears on the button in the GUI on SlashDB Log In page.
- enabled is a switch to enable authenticating with the IdP.
- saml_auth_attribute is a property from the SAML response that will be compared with
user_config_attributewhen searching for a matching SlashDB user. The SAML protocol typically stores this value in itsNameIDproperty, and the value is typically an email address. For custom SAML configurations, another property may be used; in that case, set this attribute to that property name. - user_config_attribute is a property of the SlashDB User Configuration to compare with
saml_auth_attributein order to match an IdP user with a SlashDB user. Customarily, the value will be email. - saml_auth_regex is a custom regex string pattern used to match users from a SAML Idenity Provider to a SlashDB user, making it possible to authenticate multiple users to the same SlashDB user account. Mainly used for matching user groups from Identity Provider.
- gui is a sub-section with properties to configure the GUI for each IdP.
- visible is a switch to show or hide the button for signing in with that IdP.
- settings is a sub-section with SAML 2.0 configuration details:
- sp is a sub-section with Service Provider (SP) settings:
- entityId is the globally unique ID of the Service Provider.
- assertionConsumerService is a sub-section with settings for the Assertion Consumer Service:
- url is the URL where user will be redirected after being successfully authenticated by IdP.
For SlashDB, it looks like:
https://my-slashdb.com/sso/callback/saml/my_idpwhere- "my-slashdb.com" is the domain or IP of the SlashDB instance
- "my_idp" is the unique value set for the
my_idpproperty previously
- url is the URL where user will be redirected after being successfully authenticated by IdP.
For SlashDB, it looks like:
- NameIDFormat defines the name identifier formats supported
by the identity provider. Typically, it is one of:
urn:oasis:names:tc:SAML:1.1:nameid-format:unspecifiedurn:oasis:names:tc:SAML:2.0:nameid-format:persistenturn:oasis:names:tc:SAML:2.0:nameid-format:transienturn:oasis:names:tc:SAML:1.1:nameid-format:emailAddressurn:oasis:names:tc:SAML:1.1:nameid-format:X509SubjectNameurn:oasis:names:tc:SAML:1.1:nameid-format:WindowsDomainQualifiedNameurn:oasis:names:tc:SAML:2.0:nameid-format:kerberosurn:oasis:names:tc:SAML:2.0:nameid-format:entity
- x509cert is the Service Provider certificate in base64 format used to verify the SAML Response and metadata from the identity provider.
- privatekey is the Service Provider private key in base64 format used to sign the SAML Response and metadata.
- idp is sub-section with Identity Provider (IdP) settings:
- metadata is a URL for a SAML metadata endpoint. It is used for automatically fetching idp section values. It can also be a path to a local file. The metadata contain values for the
entityId,urlandx509certproperties. If a URL is used, it must be reachable from the back end. If this is not possible, use a local file instead. - entityId is the globally unique ID of Identity Provider.
- singleSignOnService is a sub-section with settings for SSO service in IdP.
- url is the Identity Provider login page where the user is redirected to login.
- x509cert is the Identity Provider certificate in base64 format to verify the SAML Response.
- metadata is a URL for a SAML metadata endpoint. It is used for automatically fetching idp section values. It can also be a path to a local file. The metadata contain values for the
- security is a sub-section for additional SAML security settings:
- nameIdEncrypted indicates whether the nameID property in the logout request sent by this SP will be encrypted. Accepted values are
trueorfalse. - authnRequestsSigned indicates whether the AuthnRequest messages sent by this SP will be signed. The SP metadata contains this information. Accepted values are
trueorfalse. - logoutRequestSigned Indicates whether the logout request messages sent by this SP will be signed. Accepted values are
trueorfalse. - logoutResponseSigned indicates whether the logout response messages sent by this SP will be signed. Accepted values are
trueorfalse. - signMetadata sign the Metadata. Accepted values are False, True (use SP certificates) or an object with
keyFileNameandkeyFileNameproperties:{ "keyFileName": "metadata.key", "certFileName": "metadata.crt" } - wantMessagesSigned sets whether SAML Response, LogoutRequest and
LogoutResponse messages received by this SP must be signed. Accepted values are
trueorfalse. - wantAssertionsSigned sets whether SAML Assertion messages received by this SP must be signed. The SP metadata contains this information. Accepted values are
trueorfalse. - wantNameId sets whether the NameID element in the SAMLResponse received by this SP must be present. Accepted values are
trueorfalse. - wantNameIdEncrypted sets whether the
NameIDproperty received by this SP must be encrypted. Accepted values aretrueorfalse. - wantAssertionsEncrypted sets whether SAML Assertion messages received by this SP must be encrypted. Accepted values are
trueorfalse. - wantAttributeStatement sets whether
AttributeStatementproperty is required. Accepted values aretrueorfalse. - allowSingleLabelDomains if enabled, URLs with single-label-domains will be permitted by the settings validator. Accepted values are
trueorfalse. - signatureAlgorithm is the cryptographic algorithm that will be used in the signing process. Options:
http://www.w3.org/2000/09/xmldsig#rsa-sha1http://www.w3.org/2000/09/xmldsig#dsa-sha1http://www.w3.org/2001/04/xmldsig-more#rsa-sha256http://www.w3.org/2001/04/xmldsig-more#rsa-sha384http://www.w3.org/2001/04/xmldsig-more#rsa-sha512
- digestAlgorithm is the cryptographic algorithm that will be used in the digest process. Options:
http://www.w3.org/2000/09/xmldsig#sha1http://www.w3.org/2001/04/xmlenc#sha256http://www.w3.org/2001/04/xmldsig-more#sha384http://www.w3.org/2001/04/xmlenc#sha512
- rejectDeprecatedAlgorithm sets whether messages signed with a deprecated algorithm should be rejected. Accepted values are
trueorfalse.
- nameIdEncrypted indicates whether the nameID property in the logout request sent by this SP will be encrypted. Accepted values are
- extra_request_options is a sub-section for configuring some additional parameters that can be sent with each authentication request:
- set_nameid_policy sets whether or not to send a
NameIDPolicyelement with each request. Accepted values aretrueorfalse. Default value istrue.
- sp is a sub-section with Service Provider (SP) settings:
- my_idp is a unique ID for the IdP. Allowed characters are upper and lowercase
Log In
-
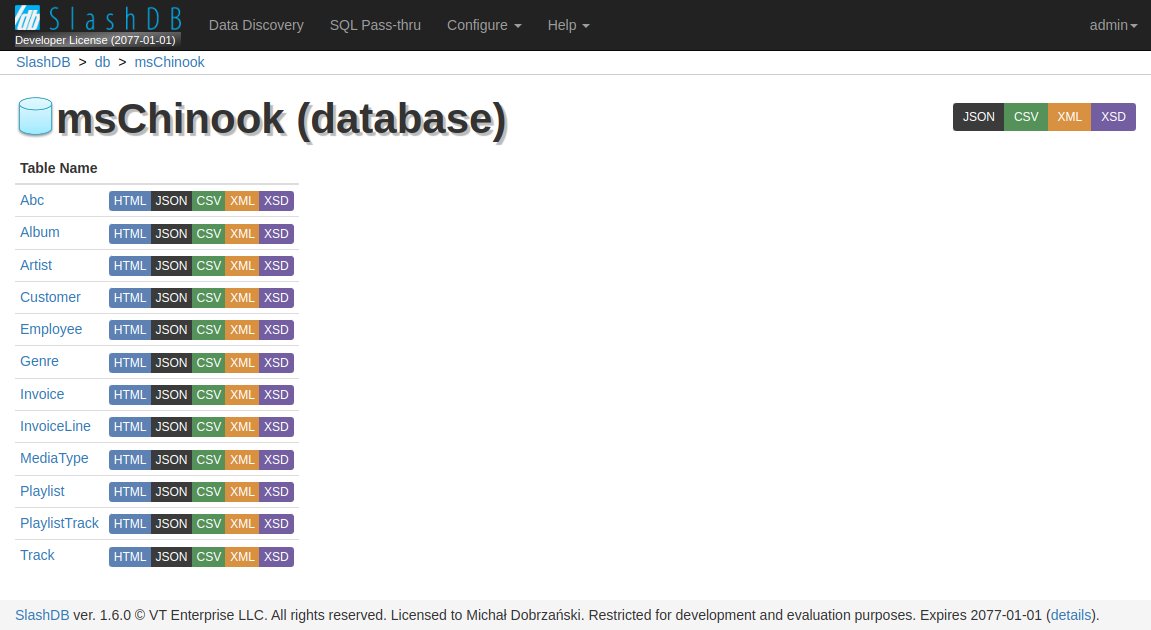
Go to the /login page. You will see a new section for logging in using SAML. Each configured identity provider has a button that links to their login portal.

-
Click on the button for the identity provider you want to log in with.
-
Next, you need to log in to your identity provider. If you are already logged in, this step is skipped. Otherwise, the identity provider login page appears where you enter your credentials.
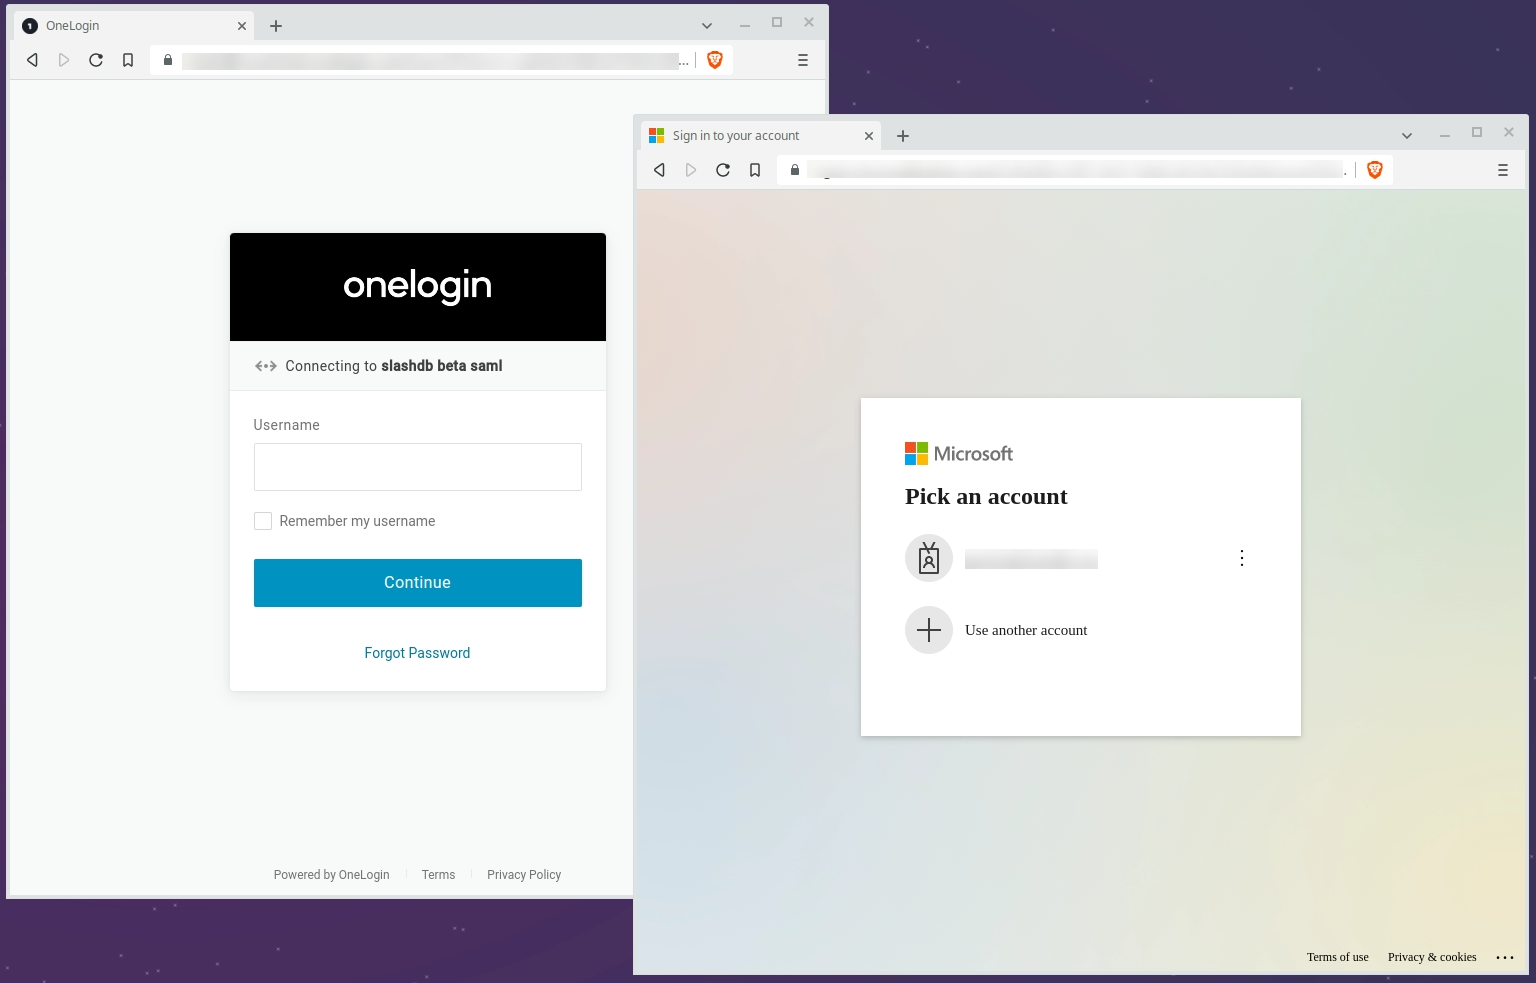
-
On successful login, the proof of authentication is passed from the identity provider to SlashDB. A new browser session is created for the SlashDB user and you will be redirected back to the last page you were browsing before logging in.
API Key
There are two types of API keys available in SlashDB:
- single parameter (
apikey) - two parameters (
appidandapikey)
The API key identifies a given user and authenticates requests to access SlashDB.
Important
API keys must be unique to each user.
The API key has to be sent either in the request header or in the query string of each request.
Caution
When the API key is sent in the query string, it may be accidentally leaked. It is recommended send it only in HTTP headers.
See the allow_apikey_in_query_string INI Setting for more info.
When a valid API key is used for HTML requests, e.g. when using browser, a cookie will be sent in response and the browser will maintain a session to authenticate subsequent requests.
Info
The name of the header and query string argument can be changed in SlashDB ini file /etc/slashdb/slashdb.ini. See INI settings for more info.
The API key is configured in User Configuration.
Single Parameter API Key
The simplest way to authenticate is by sending a single parameter, apikey.
API Key in Header
curl -i 'http://localhost/db/Chinook2.json' \
-H 'apikey: q7afxhxmyetbbq0ufi4bus82gglmzr0u'

HTTP/1.1 200 OK
API Key in Query String
curl -i 'http://localhost/db/Chinook2.json?apikey=q7afxhxmyetbbq0ufi4bus82gglmzr0u'

HTTP/1.1 200 OK
Two Parameters API Key
SlashDB also supports an API key split into two parameters, an appid and an apikey. This may come handy when integrating with API management systems like Red Hat 3scale API Management.
API Key in Header
curl -i 'http://localhost/db/Chinook2.json' \
-H 'appid: app1ABC' \
-H 'apikey: q7afxhxmyetbbq0ufi4bus82gglmzr0u'

HTTP/1.1 200 OK
API Key in Query String
curl -i 'http://localhost/db/Chinook2.json?appid=app1ABC&apikey=q7afxhxmyetbbq0ufi4bus82gglmzr0u'

HTTP/1.1 200 OK
Basic Authentication
SlashDB supports HTTP Basic Authentication. Simply send an Authorization header in the request with an encoded user name and password.
curl -i 'http://localhost/db.json' \
-H 'Authorization: Basic YWRtaW46YWRtaW4='

HTTP/1.1 200 OK
Cookie Session
Cookies are mostly used by browsers to keep a session open to identify users. A cookie is sent from SlashDB to the browser after successful authentication, and the cookie is sent on subsequent requests from the browser.
Cookie Session Configuration
The SlashDB INI file /etc/slashdb/slashdb.ini contains several parameters to configure sessions and cookies.
Expand to see INI configuration properties
- memcached_server - sets the server host and port for a Memcached server that is used for keeping processes and nodes sychronized;
e.g.
127.0.0.1:11211 - session.secret - used in encryption of the session cookie. Should be unique and random. Each instance in a cluster should have the same secret.
- session.timeout - the number of seconds after which an inactive user is logged out, by default
3600(1 hour). - session.cookie_expires - the number of seconds after which a cookie expires and the session is invalidated, by default
86400(1 day). - cookie_http_only - sets the cookie
httpOnlyflag.trueorfalse, by defaulttrue - cookie_secure - sets the cookie
secureflag.true,falseorauto, by defaultauto. When set toauto, thesecureflag is set when the request uses HTTPS. -
session.type - determines how the session is stored:
cookie- session information is stored client-side, e.g in the user's browserfile- session information is stored server-side in the file system. Only the session id is given to the user's browser.-
ext:memcached- session information is stored server-side in shared Memcached. Only the session id is given to the user's browser.Important
By default, if a memcached_server is defined then the value is
ext:memcached. Otherwise, the default isfile.
-
session.url - is the Memcached server location, by default takes value from memcached_server
- session.data_dir - is a path to the folder where session files are stored, by default
/var/lib/slashdb/sessions/data. This option valid when memacahed_server is undefined or session.type isfile. - session.lock_dir - a lock used to ensure that multiple processes/threads are not attempting to make changes in stored sessions.
Create Sessions
To create a cookie session, first log in - credentials sent as JSON:
curl -i -X POST 'http://localhost/login' \
-H "Content-Type:application/json" \
-d '{"login": "admin", "password": "admin"}'
On successful login, an HTTP 200 response is returned with a Set-Cookie header:
HTTP/1.1 200 OK
Set-Cookie: auth_tkt=a34e5f0535fada973074a68ec5eb855b5a0af71fYWRtaW4%3D!userid_type:b64unicode; Max-Age=3600; Path=/; expires=Tue, 14-Nov-2017 15:01:03 GMT
Once a client has a cookie, it can be used for subsequent requests for as long as the cookie is valid:
curl -i 'http://localhost/db.json' \
-H 'Accept: application/json' \
-H 'Cookie: auth_tkt=c7e39bdd4e670d796e506ac5ddab8ba95a0af9b9YWRtaW4%3D!userid_type:b64unicode'
End Sessions
To end the session, send a GET request to /logout. This will remove/invalidate the cookie in your application.
curl -i 'http://localhost/logout' \
-H 'Cookie: auth_tkt=c7e39bdd4e670d796e506ac5ddab8ba95a0af9b9YWRtaW4%3D!userid_type:b64unicode'
Authenticating Proxy
It is possible to integrate the SlashDB API with an external authorization system that controls if an incoming request should be sent to SlashDB. This type of solution is typically implemented using an authenticating proxy in conjunction with single sign-on and entitlement systems. If you require this level of integration, please contact us.
Public Access
For situations where open access to the SlashDB API is required, you can use the public user.
Important
Requests using the public account do not require any method of authentication.
Any request which does not contain authentication credentials will be assigned the identity and authorization of the public user.
To disable public access completely, remove the account from SlashDB. Alternatively, you can restrict what public has access to in the User Configuration menu.
Logging in using the GUI
Users can explore resources in SlashDB using a browser, but first they must log in with a username and password. The Log in button is visible in the center of the screen of the home page.
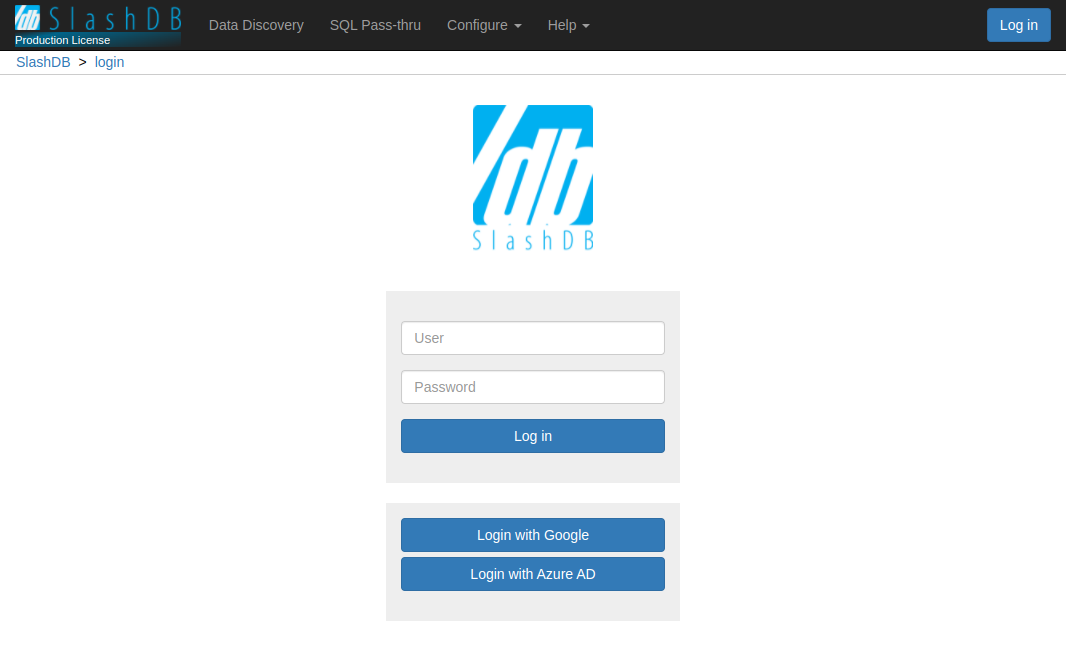
Clicking on the Log in button navigates to the Login page (/login) that shows available login
methods.
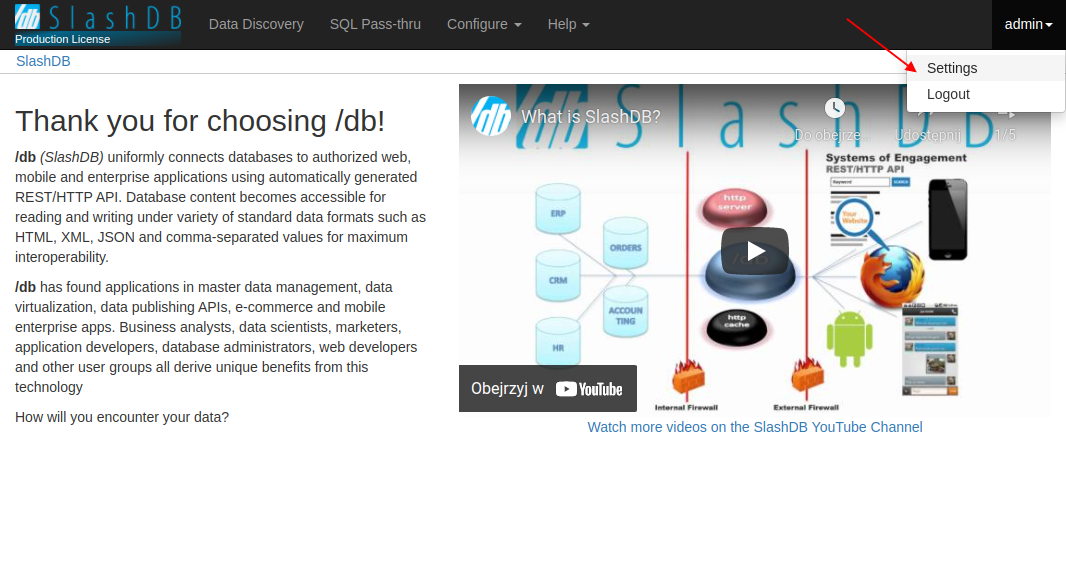
After login, the button in the top right corner is replaced with the user's first initial. Clicking on the initial will reveal a dropdown menu to with a link to the user's configuration and another for logging out
Login Throttling
If high frequency login attempts are detected, SlashDB will start returning HTTP 429 Too Many Requests errors. By default SlashDB allow an average rate of 1 login request per minute with temporary bursts of 5 login requests.
The throttling can be adjusted in the NGINX configuration file /etc/slashdb/nginx.conf by modifying the limit_req_zone directive.
Info
The most useful parameters are rate:
limit_req_zone $limit_login_post zone=login_limit:20m rate=1r/m;
and burst:
limit_req zone=login_limit burst=5 nodelay;
Example
Below is part of of the http section of /etc/slashdb/nginx.conf that limits the request
rate to an average of 1 request per minute, while allowing temporary bursts of 5 requests.
When the rate is exceeded, an error response with HTTP status code 429 is returned.
limit_req_zone $limit_login_post zone=login_limit:20m rate=1r/m;

location / {
    uwsgi_pass  slashdb_app;
    include     uwsgi_params;

    location /login {
        # allow up to 5 requests in queue, then reject
        limit_req zone=login_limit burst=5 nodelay;
        uwsgi_pass slashdb_app;
        add_header Retry-After $retry_after always;
    }
}
User Enumeration Prevention
To prevent exposing whether any given user name exists on the system, successful and failed login attempts always take the same amount of time.
Changing Passwords
A user's password can be updated in User Configuration.
A user must provide their current password to set a new one. The admin user, and users with edit privileges on another user's account may change the target user's password without knowing the previous password.
Password strength
Password strength can be configured using the min_password_strength INI setting with values from 0 to 4, where 0 is the weakest and 4 is strongest.
Info
0 - very weak: risky password. (brute force attempts < 103)
1 - weak: protection from throttled online attacks. (brute force attempts < 106)
2 - moderate : protection from unthrottled online attacks. (brute force attempts < 108)
3 - strong: moderate protection from offline slow-hash scenario. (brute force attempts < 1010)
4 - very strong: strong protection from offline slow-hash scenario. (brute force attempts >= 1010)
Example
Password strength is strong:
min_password_strength = 3
Empty Passwords
By default, a user account is required to have a password. If you need to allow empty passwords, use the allow_empty_password INI setting to enable them.
allow_empty_password = true
Standard Login Page
Out of the box, SlashDB has a login page that supports:
- login and password submitted in the form
- Single Sign On
- API Key
To enable different authentication methods to appear on the login page, see the /etc/slashdb/auth.cfg configuration file.
- A chosen authentication method can be completely turned on or off with the parameter
enabledset totrueorfalse - If the authentication method is enabled, its visibility on the login page can be controlled in the section
guiby setting the parametervisibletotrueorfalse.
Example
authentication_policies:
  jwt:
    enabled: True
    priority: 10
    gui:
      visible: True
    identity_providers:
      okta:
        idp_name: Okta
        enabled: True
        jwks_uri: https://gitbit.okta.com/oauth2/v1/keys
        claim_attribute: email
        user_config_attribute: email
        authorization_endpoint: https://gitbit.okta.com/oauth2/v1/authorize
        token_endpoint: https://gitbit.okta.com/oauth2/v1/token
        client_id: 0oadcasccOgoXtb5v5d6
        redirect_uri: https://demo.slashdb.com/login/callback?idp_id=okta
        response_type: code # id_token or code
        scope: openid email
        gui:
          visible: True
  login_form:
    enabled: True
    priority: 20
    gui:
      visible: True
  apikey:
    enabled: True
    priority: 10
    appid_name: appid
    apikey_name: apikey
    gui:
      visible: False
  basic:
    enabled: True
    priority: 30
  cookie:
    enabled: True
    priority: 50
Expand to see configuration properties
- jwt
- enabled
true- enable authentication using tokens in theAuthorizationheader - gui
- visible
true- the Single Sign On section will appear on the standard login page
- visible
- identity_providers
- okta
- enabled
true- requests with JWT can be identified with the identity providerokta - gui
- visible
true- a Single Sign On button for the identity provideroktawill appear on the standard login page
- visible
- enabled
- okta
- enabled
- login_form
- enabled
true- enable authentication by sending a username and password to the/loginendpoint. - gui
- visible
true- the login form will appear on the login page
- visible
- enabled
- apikey
- enabled
true- enable authentication with an API Key - gui
- visible
false- a form to log in with API Key won't appear on the standard login page
- visible
- enabled
- basic
- enabled - enable Basic Authentication login requests
- There is no gui section for basic
- cookie
- enabled - enable cookies to be set by SlashDB and sent by the client in subsequent requests
- There is no gui section in for cookie
Custom Login Page
Important
This feature is only available in Enterprise Edition
SlashDB supports custom login pages. To find out more, please contact techsupport@slashdb.com.