VirtualBox
SlashDB ships fully configured as a virtual machine image for VirtualBox. VirtualBox allows for a fully functional SlashDB server in one download that avoids a lengthy installation process. Evaluate VirtualBox on a laptop then clone and reside it to an enterprise server.
1. Download the OVA file with SlashDB
https://downloads.slashdb.com/versions/1.8.90/slashdb-1.8.90.ova
Linux bash commands:
wget -c https://downloads.slashdb.com/versions/1.8.90/slashdb-1.8.90.ova
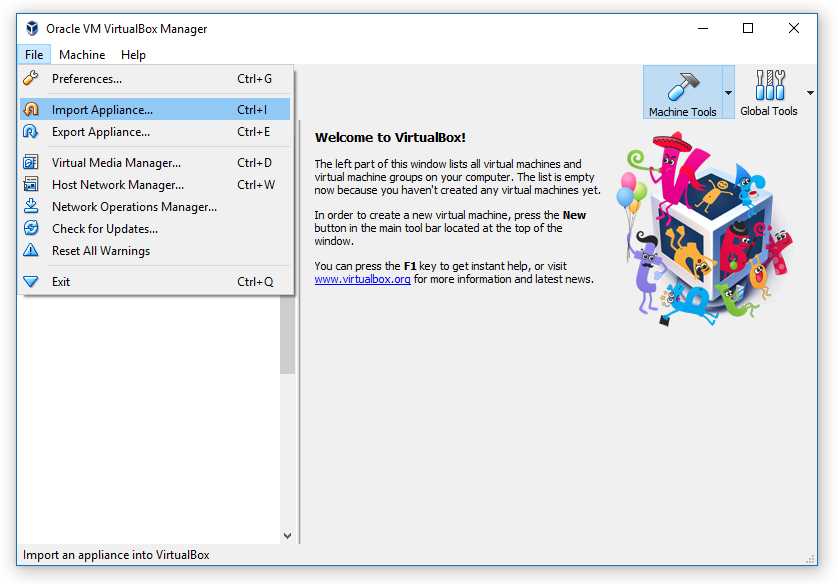
2. Launch the VirtualBox and import OVF file using menu option File -> Import Appliance (Ctrl+I)
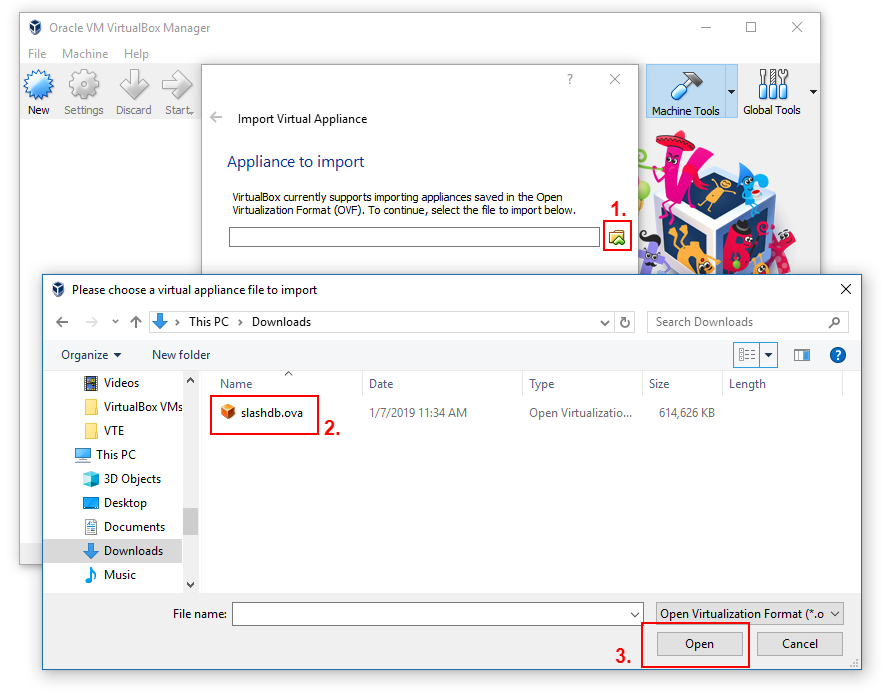
3. Select downloaded OVA file and click Next.
4. Default settings
During the process of import one of the screens will have "Appliance settings". We've prepared the machine with typical settings, but if you want to, you can adjust CPUs, RAM or change the name to something more friendly.
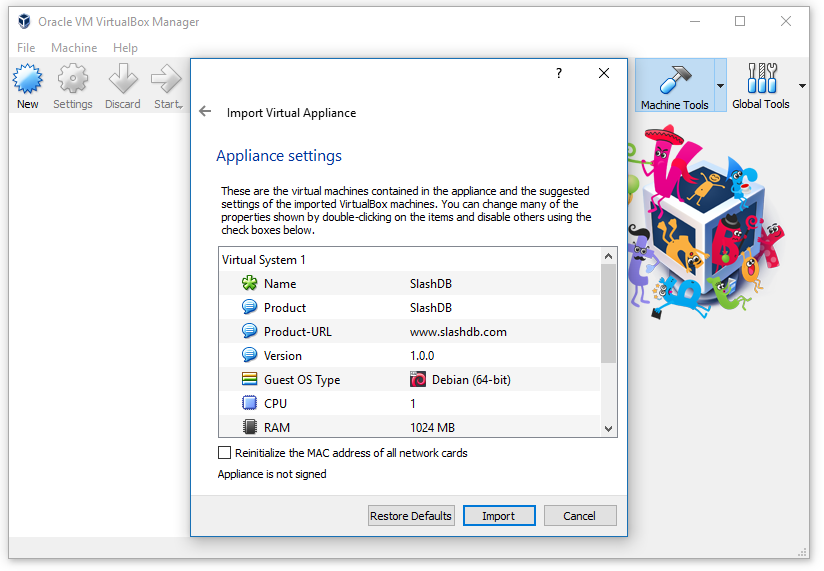
When ready click Import.
5. Import in progress
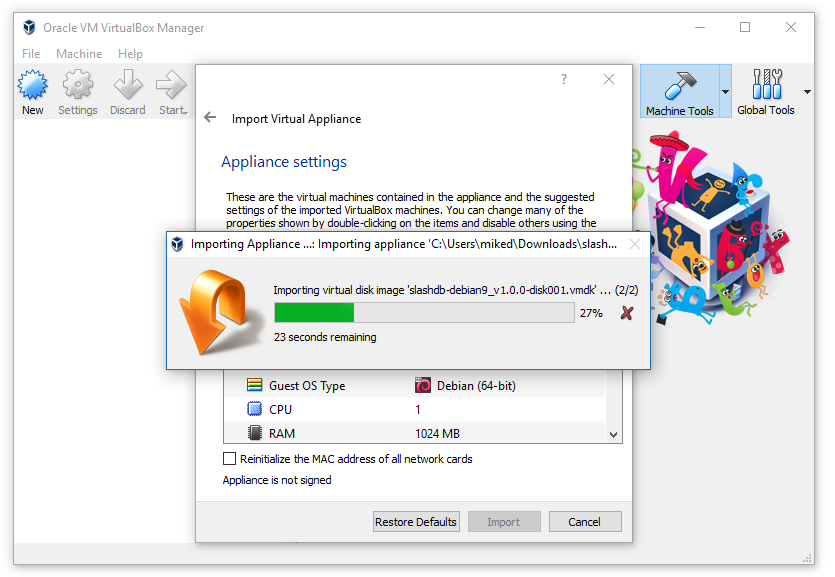
When complete, the imported machine will appear on the list.
6. Update network settings and run.
Virtual machine with SlashDB is a REST API hence you must decide how to deploy it in your network. Whether you prefer to run machine in the same network as host or behind the NAT. As If DHCP is available We recommend bridged because it doesn't require additional port forwarding.
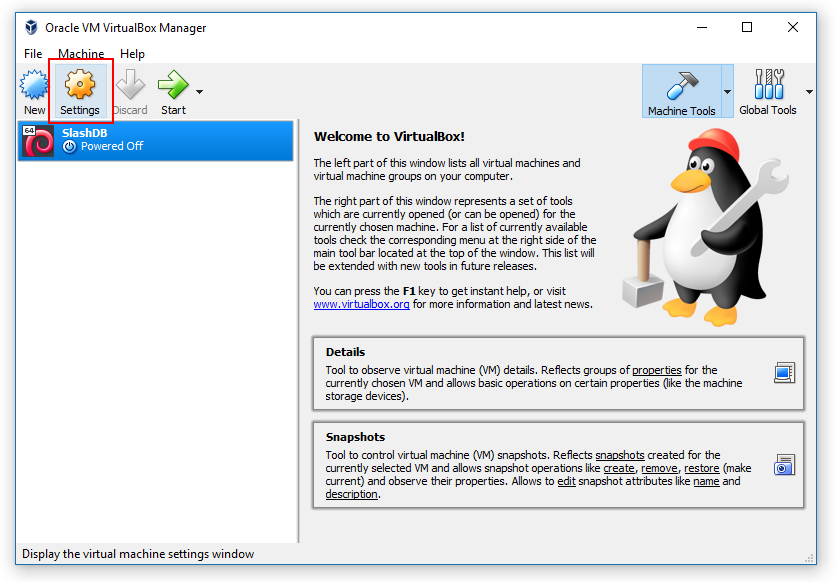
Select imported virtual machine from the list and press the Settings button in toolbar.
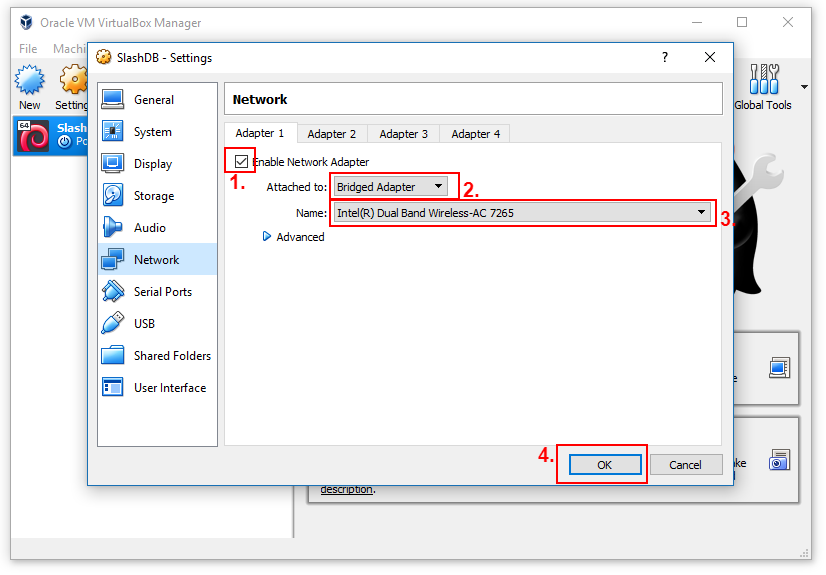
Bridged network interface
From setting menu select Network. Make sure Enable Network Adapter is checked. From dropdown menu Attached to select Bridged Adapter, from dropdown menu Name select your real network interface that is used to connect to network, DHCP server, internet etc. Confirm with OK
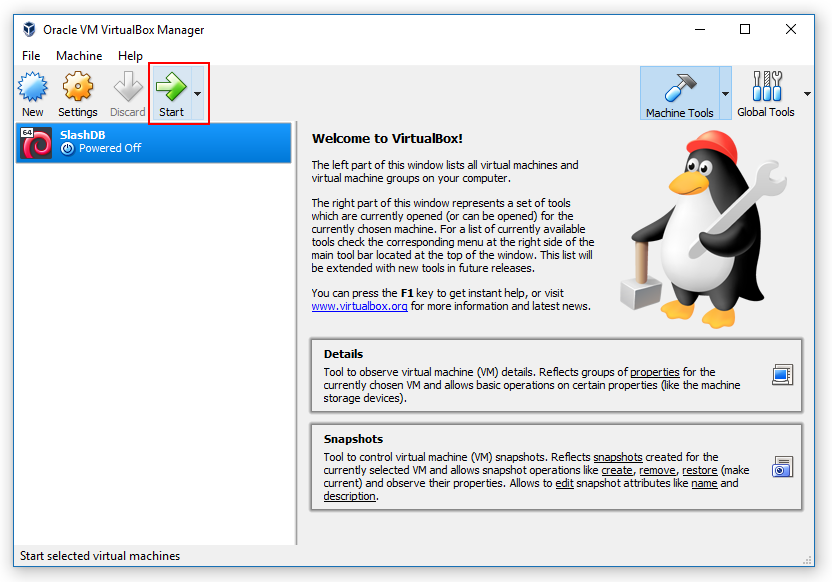
Again on the list of virtual machines select SlashDB vm and press Start button.
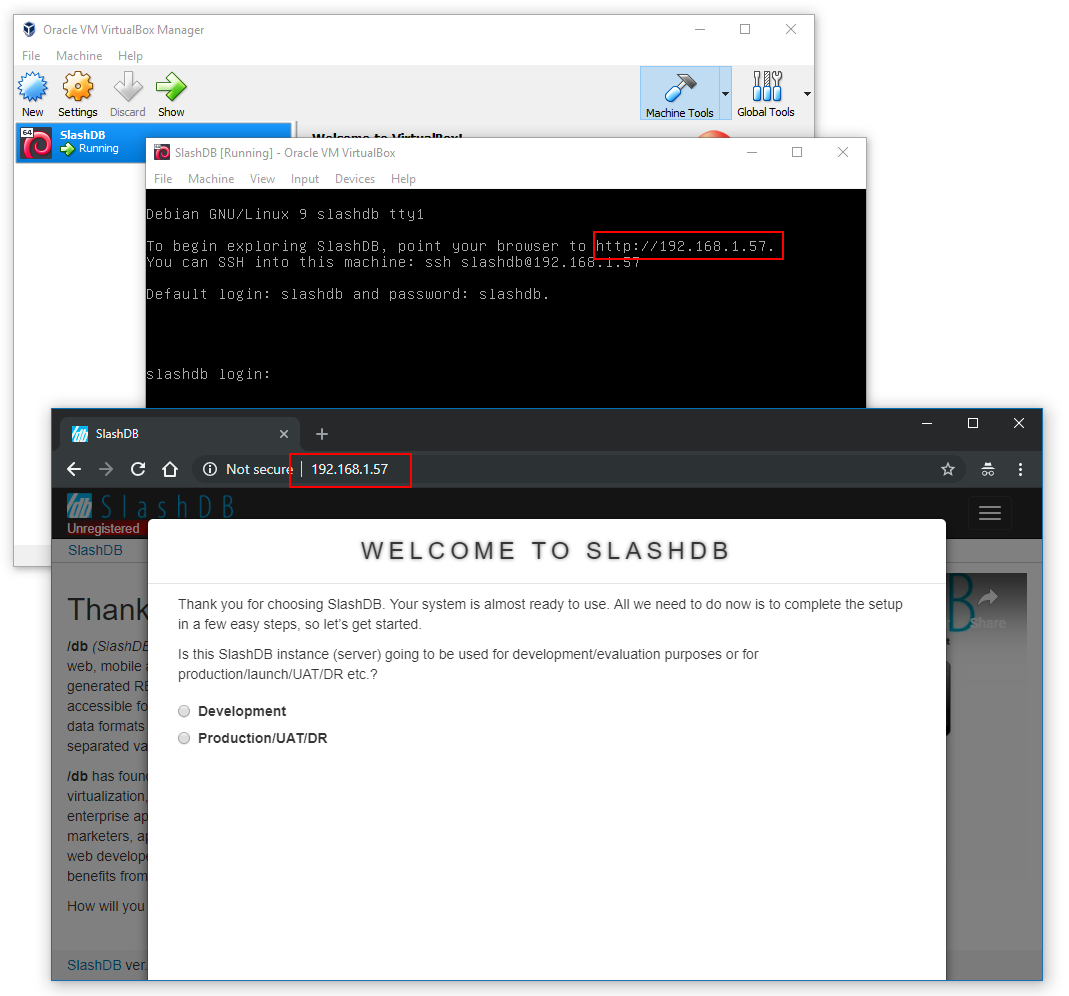
The virtual machine with SlashDB will start booting, it will acquire IP address from DHCP server and you will see a welcome message displaying that IP address. If it's not shown means that virtual machine didn't get the IP and you need to fix network configuration.
Point your browser to that IP address to start using SlashDB in below example it's http://192.168.1.57.
NAT
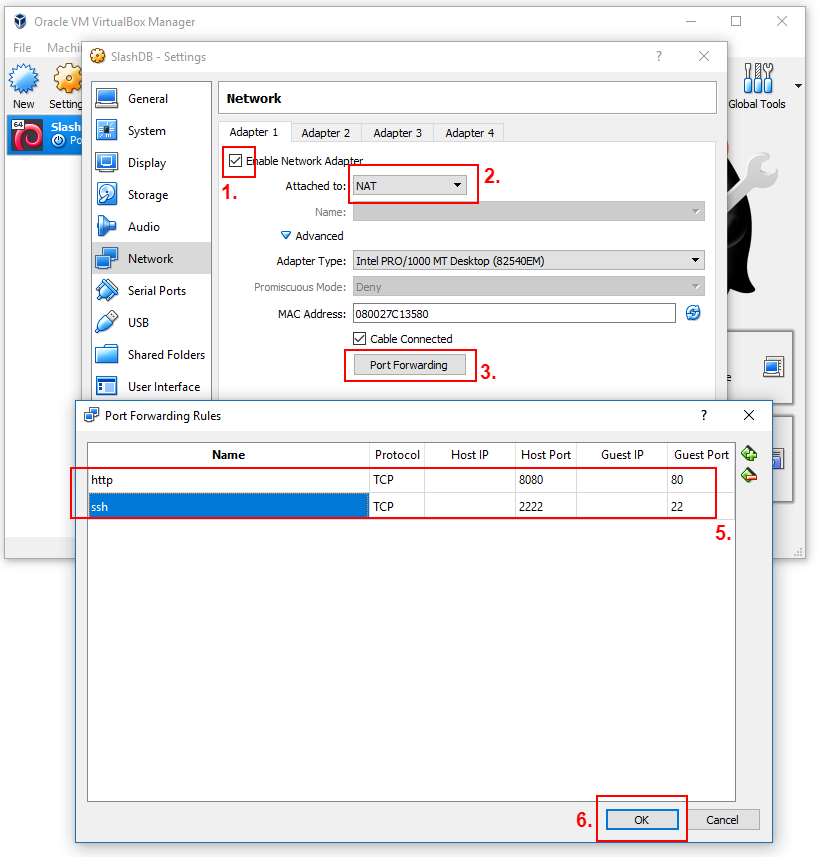
From setting menu select Network. Make sure Enable Network Adapter is checked. From dropdown menu Attached to select NAT, click Port Forwarding button and configure to forward preferred port to Guest Ports 80 for HTTP and 22 for SSH.
In the below screenshot you can see configuration which will pass communication:
* host on port 8080 to guest machine on port 80
* host on port 2222 to guest machine on port 22
Confirm with OK buttons and return to the list of virtual machines.
On the list of virtual machines select SlashDB vm and press Start button.
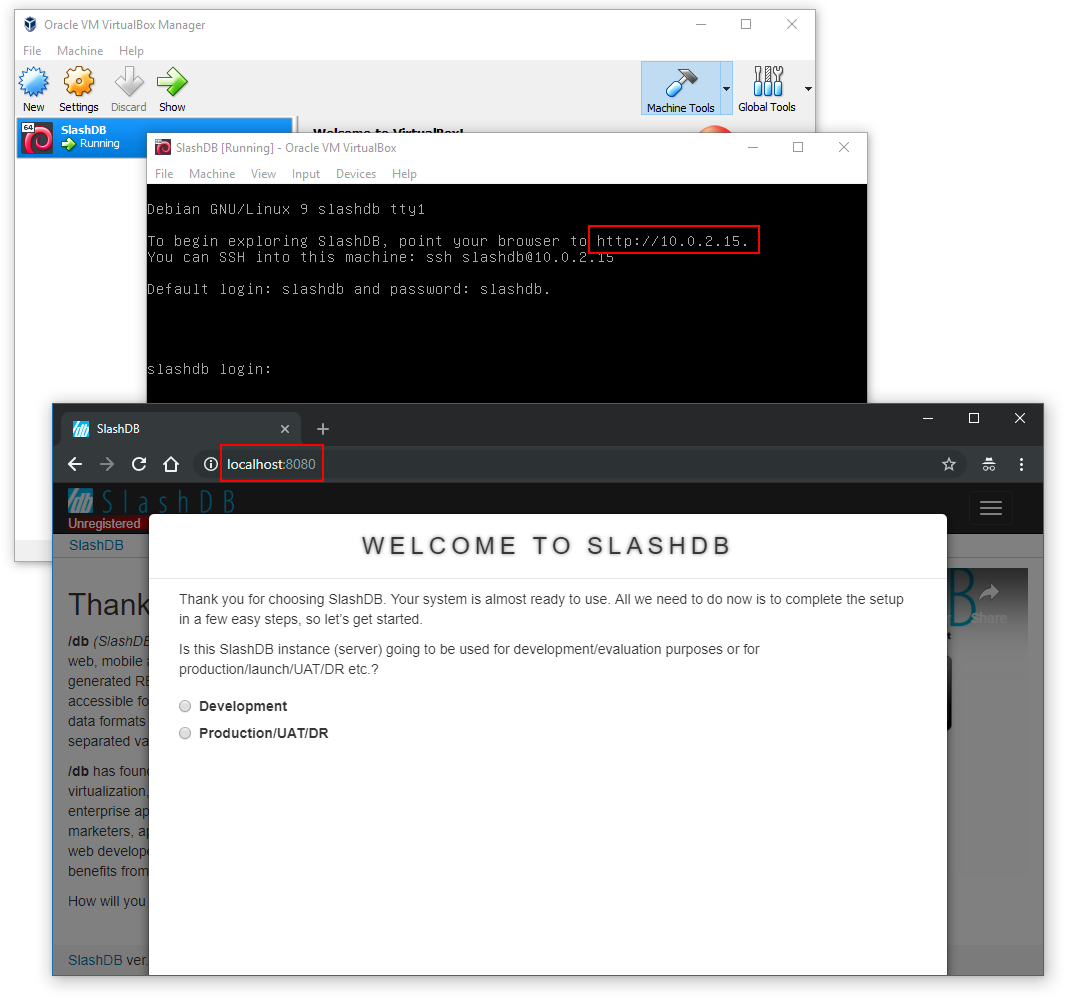
The virtual machine with SlashDB will start booting, it will obtain IP address in a NAT subnet and you will see a welcome message displaying that IP address. If it's not shown means that virtual machine didn't get the IP and you need to fix network configuration.
That address is not accessible from host directly hence you need to access the SlashDB service through localhost on forwarded port e.g. http://localhost:8080