VMWare
SlashDB ships fully configured as a virtual machine image for VMWare. VMWare allows for a fully functional SlashDB server in one download that avoid a lengthily installation process. Evaluate VMWare on a laptop then clone and reside it to an enterprise server. VMWare requires familiarity with VMWare tools such as VMWare Workstation, VMWare Player and is a relatively large download.
Instructions
1. First download and unpack the zip archive http://downloads.slashdb.com/latest/slashdb-vm-img.zip
Linux bash commands:
wget -c http://downloads.slashdb.com/latest/slashdb-vm-img.zip
unzip slashdb-vm-img.zip
The zip archive contains two files:
- box.ovf
- box-disk1.vmdk
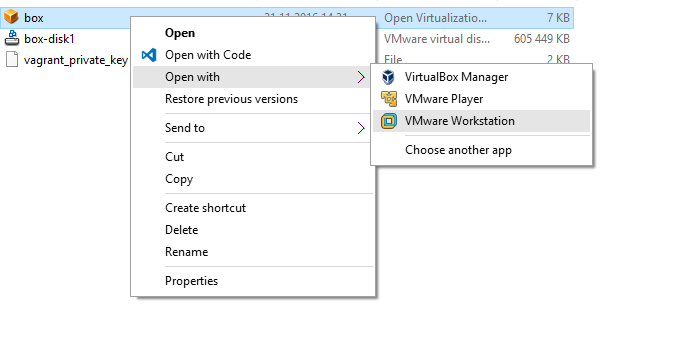
2. Make sure VMWare is installed and that the box.ovf and box-disk1.vmdk files are on the drive. Once that's done, right click box.ovf and select VMware Workstation.
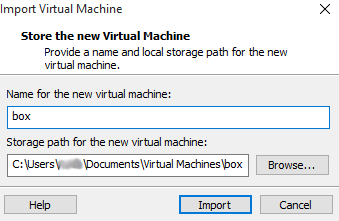
3. VMWare will start the import process.
4. Name the virtual machine or leave the default. Click Import.
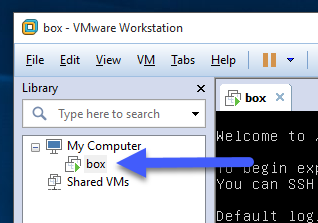
5. After the process finishes a new entry in the left panel should appear.
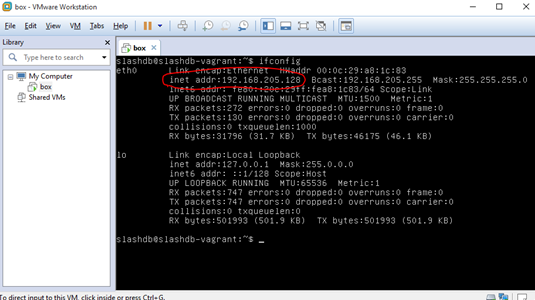
6. VMWare doesn't setup port forwarding automatically so it must be set manually. In the VM window login as slashdb and get the VM IP address. Type in ifconfig and hit enter.
7. The address should be visible as shown below.
8. Go to Edit > Virtual Network Editor and make sure that you have administrative privileges. After administrative privileges are confirmed go to the Virtual Network Editor.
9. Select NAT entry on the visible list and click NAT Settings....
9. On the new window Add....
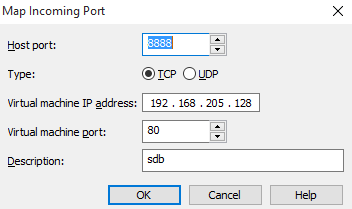
10. Fill-out the form as shown below. Make sure to change the Virtual machine IP address to that acquired in step 6.
11. Click OK. Close the rest of the windows and go back to the main VMWare window.
12. Restart the virtual machine.
13. To finish setup see: Logging in for the first time.